
Web Languages
Download as PDFOverview
You can make the content and navigation menus of your website available in multiple languages.
If you manage multiple websites in Backstage, contact the picturemaxx team to unlock custom web languages so you can define them individually for each site.
Define a default language for cases where a visitor’s preferred language isn’t available, and simply activate any additional languages you want to use for your content.
Note
The settings you choose here for editing web content and for the languages available on your website are based on the language options you set up in Administration › Language Settings › Languages.
For more details, see the Languages FAQ.
Activate language settings
To configure language settings, proceed as follows:
- Navigate to Web > Settings > Web Languages.
- Select the following options:
- From the Default Language drop-down, select the language to use when a visitor’s browser language isn’t available.
- In the Select Languages table, activate any languages you want to use for:
- Web unpublished: a backend language for editing content
- Web published: a frontend language that appears live on the site
- Click Save.
Note
If you do not enable the Web (published) option for a language, its content remains hidden from website visitors. This lets you prepare content in that language without publishing it immediately.
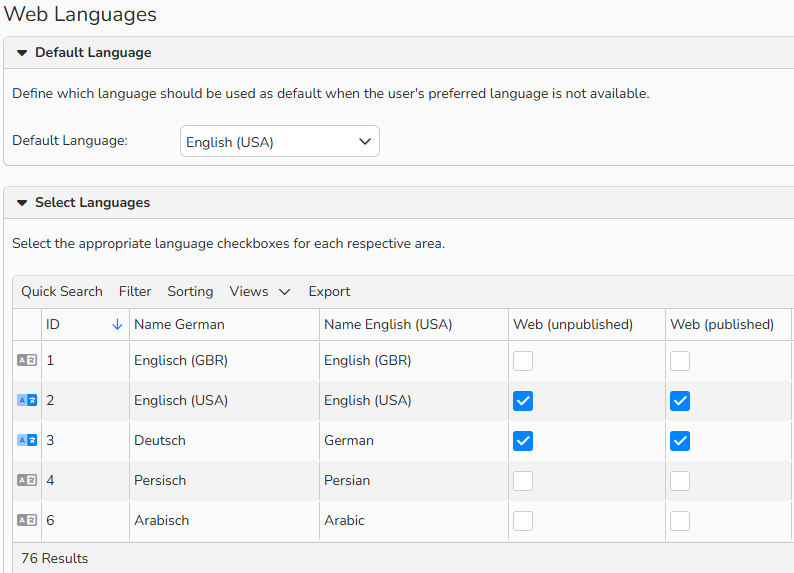
Web Languages window
Note
- The settings made here for editing content and actively selecting languages for the website refer to the settings made under Administration > Language settings > Languages. You can find out more in the corresponding FAQ.
- Changes to your Web languages are saved immediately, but they appear on your website only after you cleared your browser cookies to remove the cached page.