
Document Management
Download as PDFOverview
Every module in picturemaxx Backstage has a Templates > Document Management area, where you can upload and organize your files. Additionally, there is the Document Management tab in the records in Sales, Purchasing, and Administration modules tailored to the module-specific needs.
Document Management is where you build your customized file storage, for example:
- Media: Manage ICC profiles to make available within specific actions.
- Sales: Store general price lists.
- Purchasing: Maintain press credentials and standard contracts.
- Marketing: Upload flyers and corporate presentations.
- Web: Upload logos, team photos, reference scans, or PDF documents to feature on your website.
- Finance: Provide files to import payment data.
- Administration: Save you company logo for corporate data and your system’s logo line.
Files you upload to a Document Management area become available within the relevant module’s features. Before you start, design a file structure that makes files easy to find — especially when you need them in other contexts.
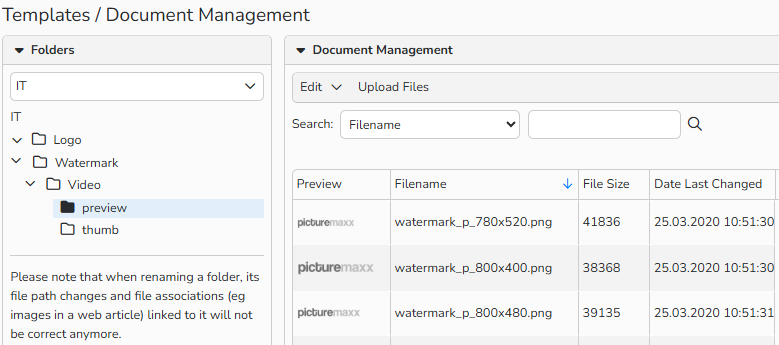
Administration module: Document Management
Add folders to organize uploaded files
Within any a Backstage module, access Document Management to create and manage multiple-level folder structures for uploaded files.
Create Folder
- Navigate to a corresponding module (Sales, Purchasing, or Administration) > Templates > Document Management.
- In the Document Management window, right-click an existing folder to access its context menu.
- Select Add Folder (current level)/ Add Folder (level below).
- You can show or hide all folders with a single click with Expand all Folders / Collapse all Folders in the context menu.
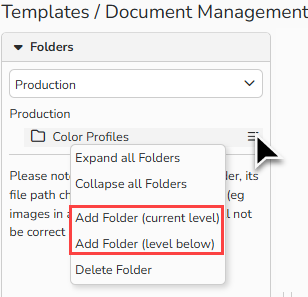
Document Management window: Folder context menu
Rename Folder
- Navigate to a corresponding module (Sales, Purchasing, or Administration) > Templates > Document Management.
- In the Document Management window, double-click a folder’s name, type a new name, and then press Enter.
Important
When you rename a folder, you need to update any existing links to its contents. These links rely on the full folder path, so changing the name can break the connection.
Delete Folder
- Navigate to a corresponding module (Sales, Purchasing, or Administration) > Templates > Document Management.
- In the Document Management window, right-click a folder and select Delete Folder from the context menu.
Note
You can delete only empty folders. First remove the folder’s contents.
Upload files
With the built-in upload feature in Backstage, you can easily upload files to Document Management in a relevant system area.
To upload files to a Document Management folder, proceed as follows:
- Navigate to a corresponding module (Sales, Purchasing, or Administration) > Templates > Document Management.
- In the Document Management window, open the folder where you want to upload the file.
- Click Upload Files. In the upload file dialog:
- Click Add Files to locate files on your computer.
- You can also drag-and-drop the files directly from your Explorer (Windows) or Finder (Mac) into the upload area.
- Click Upload All Files.
- After the upload completes, click Back to Overview.
- Click Add Files to locate files on your computer.
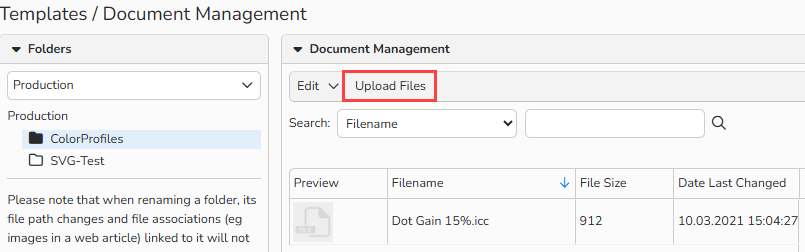
Document Management: Upload files