
Classifications
Download as PDFOverview
Classifications are tools for media labeling. Within media classifications, you can define multilingual content for database fields that should be available by default when editing metadata. You can also map individual terms and create hierarchical tree structures, for example, to organize locations, license types, formats, people, usage notes, and more.
Create Classifications
To create Classifications, proceed as follows:
- Navigate to Media Management > Classifications > Classifications.
- Select Edit > New to open a new classification setup window.
- In the Master Data panel, configure the following general settings:
- Name: Specifies the internal name of the classification.
- Classification is Active: Activates the media classification for Backstage use.
- Activate Classification in Webgate: Activates the classification for use in your Webshop.
- Classification is Field Specific: Link the classification to a database field in the Media Processing area. When selected, related fields fill automatically; if not, fields use default text.
- Value and Display separated with '=': The field value appears to the left of the equal sign; the text displayed in Backstage appears on the right
- External Reference: If you have an external classification or thesaurus that you want to import into BS, enter the match code here.
- Click Save.
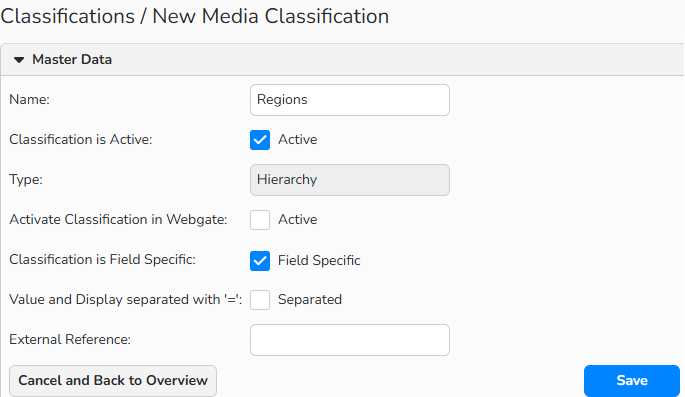
Classifications window: Master Data panel
- In the Manage Structure and Field Mapping panel (only for field-based media classification):
- Configure the first level of your classification. Available settings are:
- Name: Specify the name of the level.
- Field Mapping: Set a link to a metadata field.
- Field Mapping Collections: Set the mapping to a field mapping collection.
- Levels: Select the number of levels to create.
- Add further levels with Edit > Add New Level.
- To delete a level, click Edit > Delete Last Level.
- Confirm each level by clicking Save Level.
- Configure the first level of your classification. Available settings are:
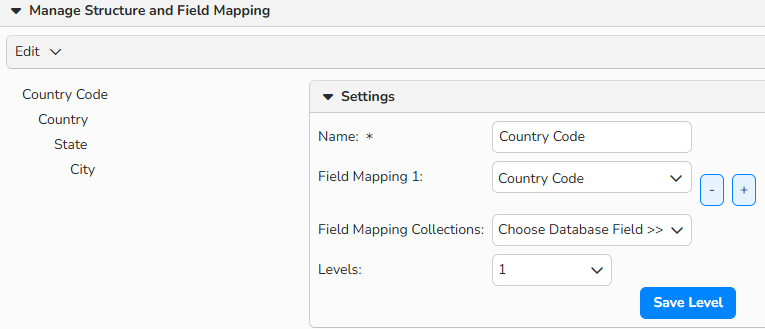
Classifications window > Manage Structure and Field Mapping panel: Field-Specific Classification
- To customize level elements, switch to the Elements tab:
- To add elements, select an option from the Edit menu:
- Add new element (top level)
- Add element (current level)
- Add Element (level below)
- The element structure matches the structure defined in the Master Data tab.
- From the View menu, choose how you want to display the elements:
- Tree View
- Hierarchical View
- Flat View
- Add translation for an element, if you have a multilingual mask set for media labeling.
- The option is only available for the languages defined in Administration > Language Settings > Languages.
- Translations appear only as display options when applying a classification filter on the web. They do not affect Backstage.
- To add elements, select an option from the Edit menu:
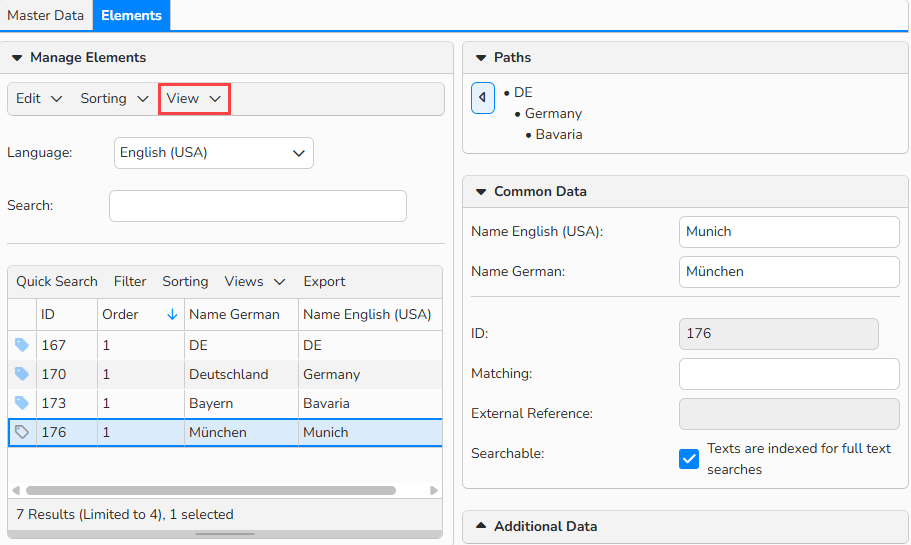
Classifications window > Element tab: Flat View
- For long lists of elements, use the search field. Start typing a term, the autocomplete feature will suggest matching options.
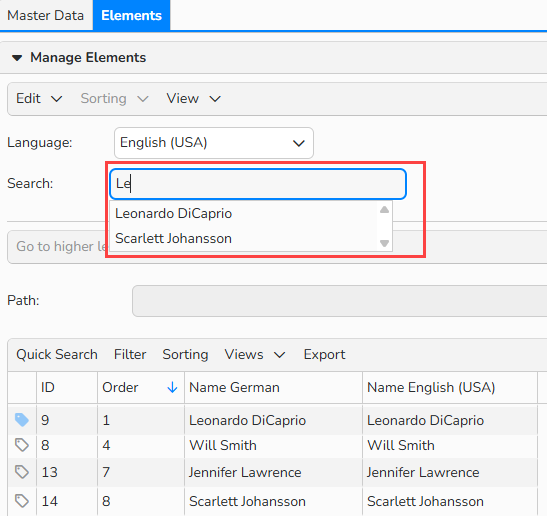
Classifications window > Element tab: Autocomplete suggestions in search
Tip
Export to SKOS format (RDF/Turtle)
This feature converts your hierarchical classifications and thesauri into a standardized, interoperable format that other systems can easily process.
In the top menu of the Classifications window, go to Edit > Export (SKOS).
Note: This function requires Export permissions in the classifications module.
Use Classifications in Media Labeling
There are two ways to use created classifications in Media Labeling masks:
Option 1
Start typing in a linked database field (a field with the  button next to it), the autocomplete feature will suggest matching options:
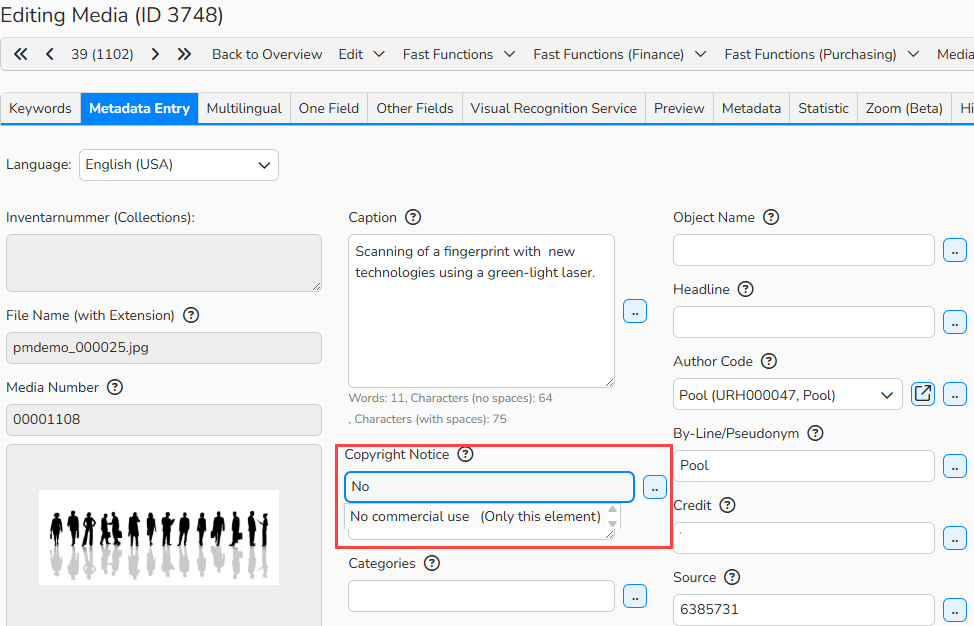
Media Labeling: populate a linked database field, autocomplete feature
Option 2
- Open a classification overview with the
 button next to any linked database field.
- In this overview, you can drill down to lower-level elements and select them individually.
- Use the search function to quickly find elements when working with a large number of classifications.
- When adding a classification element to a metadata field, you can specify whether to include the element's parent and/or child elements. The following options are available:
- Only this Element
- This and Parent Elements
- This and Child Elements
- This and Parent and Child Elements elements.
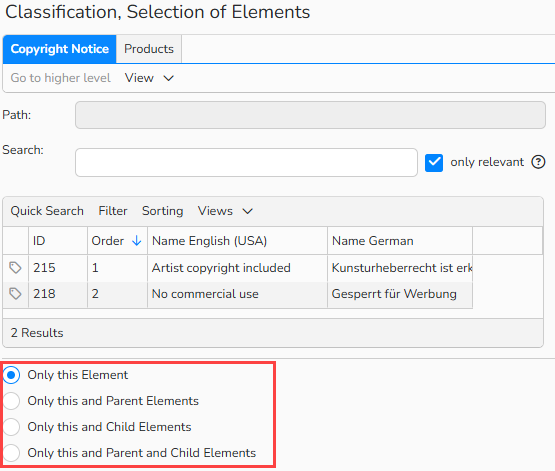
Classification overview: element options
Note
You can define which element options are available globally under Administration > Form Editor > Classifications.
Manage Classifications
You can find a list of all classifications under Media Management > Classifications > Classifications.
Create new Classifications
Select Edit > New.
Edit existing classification
- Double-click an entry or select it and click Edit > Open.
- Make the adjustments and confirm with Save.
Copy existing Classifications
Select the entry you need to copy and click Edit > Copy.
Delete existing Classifications
Select the entry you no longer need in the overview and click Edit > Delete.
Note
The integrated table functions allow you to search, filter, and sort records. For more information on these functions, as well as how to set up custom views and use the export function, see the Advanced Table View FAQ.