
Price Codes
Download as PDFOverview
Each media item may have different pricing. By assigning a price code to a media item, you can link it to the appropriate price list. These codes are based on specific metadata and fall into one of two categories: RM (Rights-Managed, license required) or RF (Royalty-Free, license-free).
Use the “RF” and “RM” price codes already integrated in Backstage and adapt them for your purposes, for example for different collections. Assign type and priority and define which value you search for in which field when specifying the price, e.g., “RF” in the “Special Instructions” field. The price codes also appear for selection in the price lists.
Create price codes
To create price codes, follow these steps:
- Navigate to Finance > Prices > Price Codes and select Edit > New.
- Define General Data:
- Name: Give the price code a unique name.
- Type: Choose between RF and RM.
- Priority: Use priority when a media item has multiple price codes to establish a ranking.
- Click Save to display existing and matching price lists based on your type selection.
- In the Price Lists panel, select the appropriate lists and add them with Add. Clear selections with Remove.
- In the Price Code Selection panel, define the selection criteria for the price code:
- Author: Select all authors or a specific author to assign this price code to.
- Metadata Filter: Configure variable price lists and pricing models using metadata filters to adapt quickly to changing conditions. Add criteria rows with the plus icon or remove them with the minus icon.
- Confirm with Save.
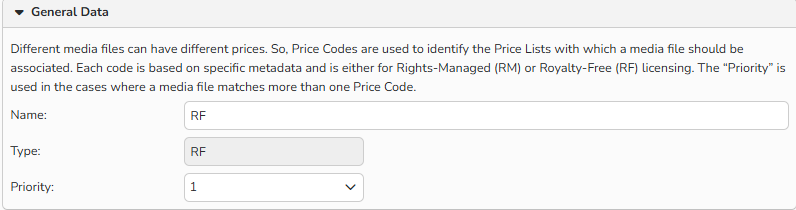
Price Code dialog: General Data
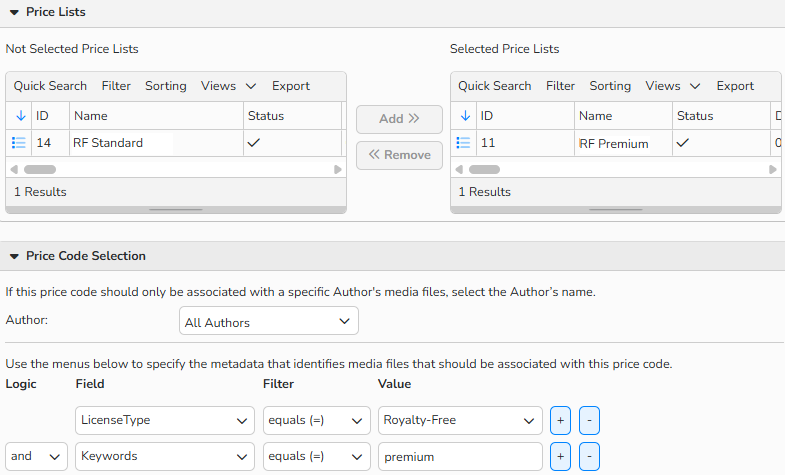
Price Code dialog: Select matching price lists and configure Author and metadata
Note
Learn more in Price Lists.
Manage price codes
Manage your price codes in Finance > Prices > Price Codes.
Create a new record
- Select Edit > New.
Edit an existing record
- Double-click the record or select it and click Edit > Open.
Delete a record
- Select the record you don’t need and click Edit > Delete.
Note
The integrated table functions allow you to search, filter, and sort records. For more information on these functions, as well as how to set up custom views and use the export function, see Advanced Table Views.