
Visual Recognition Service
Download as PDFOverview
Effective keywording is crucial for successful image marketing. But high quality is often associated with a lot of effort. picturemaxx streamlines this by automatically recognizing key image content and attributes and then integrating the metadata in your Backstage system.
The feature improves search accuracy and makes it easier for customers to find your content – via text search and search filters in the webshop or my-picturemaxx.
You can choose from leading image recognition providers – Amazon, Clairifai, Google, and Microsoft – each offering tailored solutions for targeted content analysis and keywording suggestions.
Only labels that meet a predefined confidence threshold are applied, ensuring relevance and consistency in your metadata. This ensures optimal support for your keywording process.
Steps to enable the visual recognition service:
- Review the available services and estimate costs for your company.
- Activate Visual Recognition Service in Backstage after reviewing and accepting the information.
- Add a metadata form for quick review and editing the automatically recognized keywords.
- Configure one or more action runs to analyze your images and write keywords into metadata.
Choose an image recognition service
Backstage offers access to image recognition services from Amazon, Clairifai, Google, and Microsoft, which you can use individually or in any combination. Each provider delivers unique features to cover a wide range of topics.
You will find a full overview of features and pricing under Administration > Visual Recognition Service in the Services and Pricing tab.
To review the costs incurred, select the relevant billing period under Current Costs:
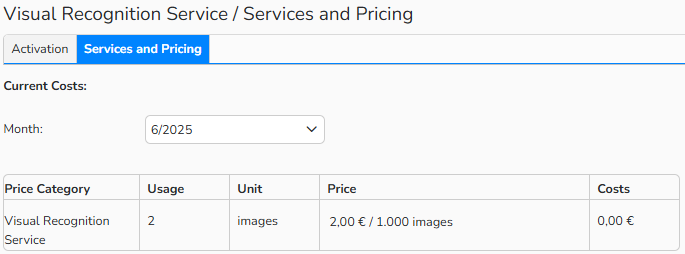
Services and Pricing tab: a billing period selected to display incurred costs
Activate visual recognition service
Review the available services and estimate costs for your company under Administration > Visual Recognition Service > Activation.
To use the Visual Recognition Service, enable activate picturemaxx Visual Recognition Service and click Save.
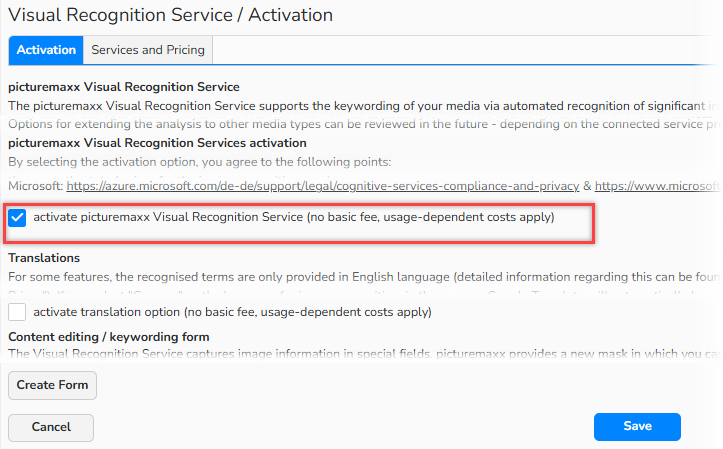
Activation tab: enable Visual Recognition Service
Create a media processing form
Click the Create Form button in the Activation tab to immediately add the Visual Recognition Service tab to Media Processing. All database fields that can be filled by the Visual Recognition Service will now appear in the tab.
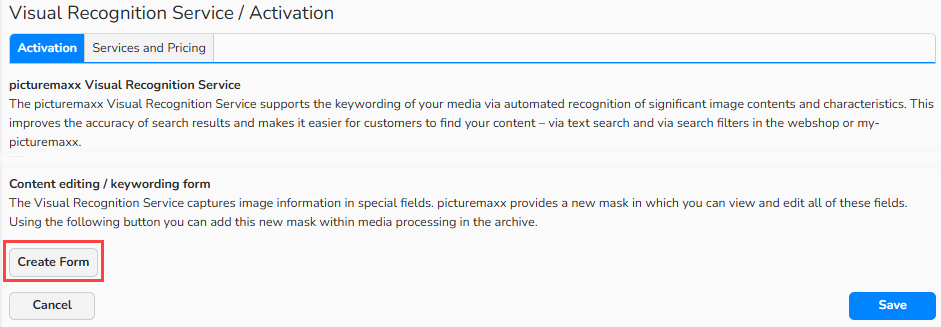
Activation tab: the Create Form button to configure metadata form
Note
Alternatively, you can configure your metadata form individually in Administration > Form Editor > Media Processing.
After adding the Visual Recognition Service tab, you need to configure access permissions:
- Go to Administration > Form Editor > Media Processing and select the Visual Recognition Service form.
- In the Access tab, assign users or access groups who should have access to the form.
- Click Save.
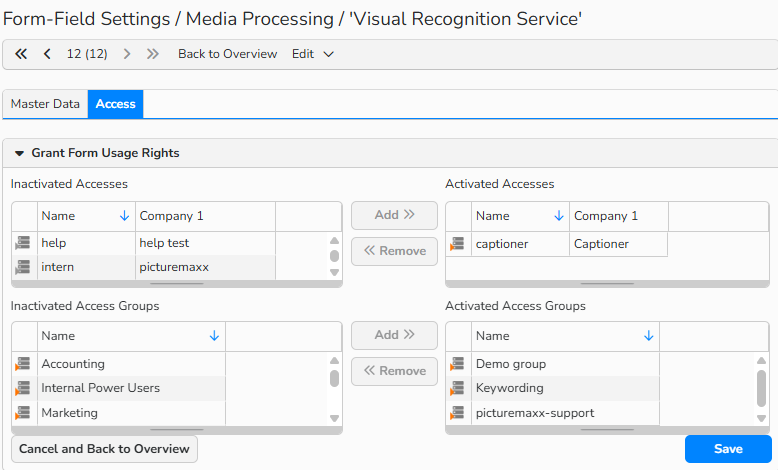
Form Editor: Access tab
Note
For further information on mask configuration in Media Processing, refer to the FAQ Form Editor: Media Processing.
Set up an action run for keywording
To set up the Visual Recognition Service action run for keywording, proceed as follows:
- Navigate to Media Management > Action Runs.
- Create a new or open an existing Action Run.
- In the Configure Action Run panel, select Visual Recognition Service from the New Metadata Action dropdown.
- Enter an Action Name and set the Position in the action sequence.
- Enable the Action is Active option to activate the action run.
- Choose the Metadata Language (the label mask) for values transfer. The option is only available if multiple languages are enabled in the media label.
- Select Services and individual Features for the action run.
- Set the output language for each service.
- See the “Activate the translation option” section of this document for details on the keywording languages.
- Click Save Settings (use requires charge).
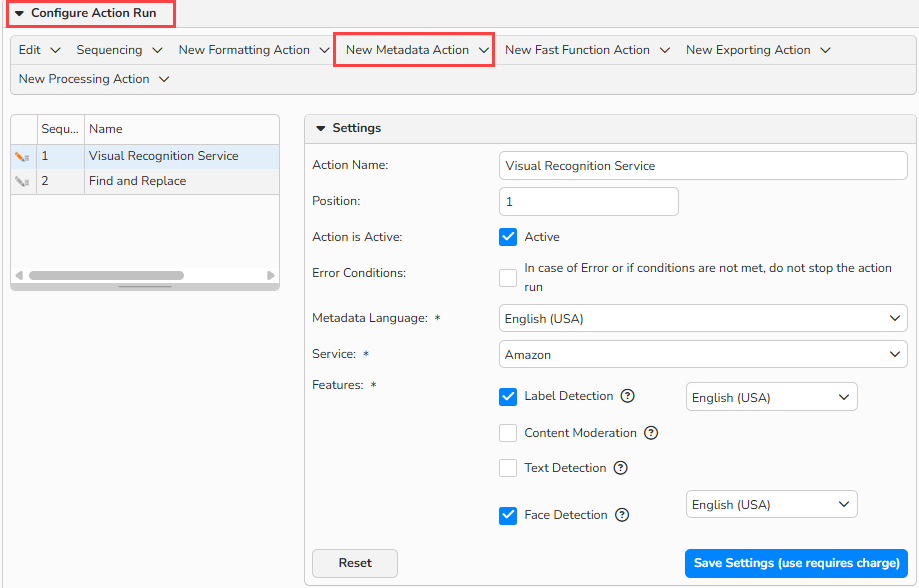
Configure Action Run: setup of the Visual Recognition Service action run
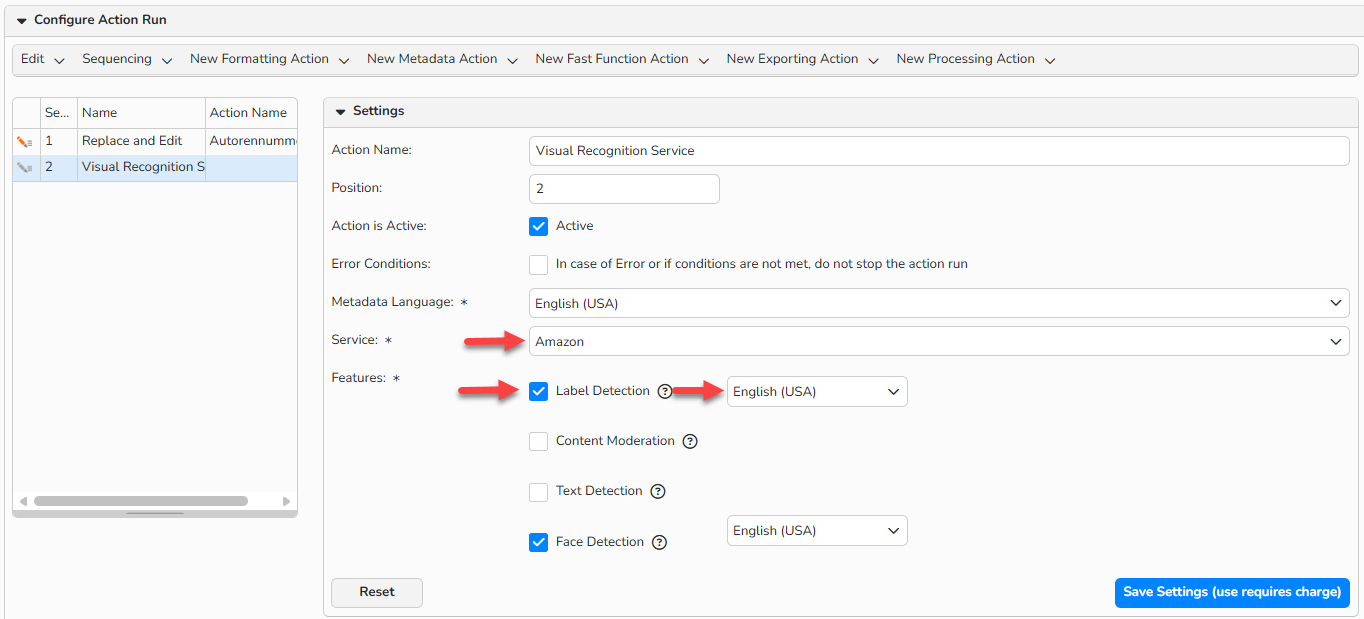
Action Workflows > Panel Configure Action Run: Configure Visual Recognition Service
After executing the Action Run, you can review the suggested terms and their confidence score.
- You can edit the recognized terms manually or remove them.
- You can also add the terms manually to the keyword list. See the Review and edit labels section below.
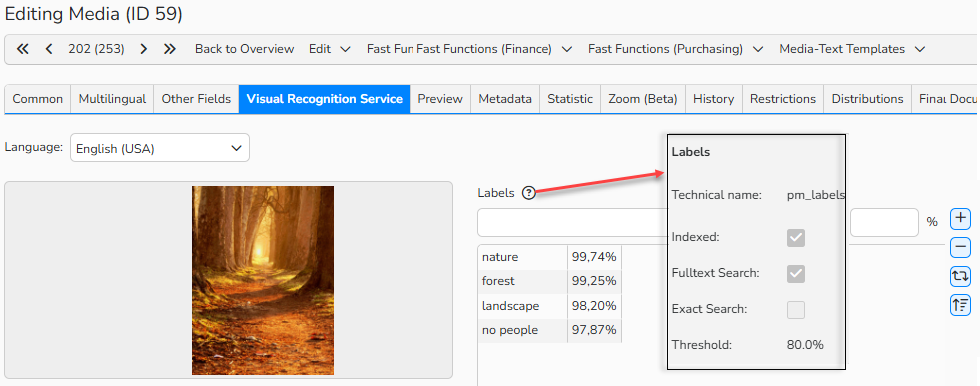
Visual Recognition Service tab in Media Processing: label recognition results
Tip
Confidence score tooltip
Hover over the question mark in the Visual Recognition Service tab to view the confidence threshold for each field.
- Only terms exceeding this value are added to the search index and become searchable in the archive.
- All recognized terms remain available for manual review and editing.
Please contact us, if you would like to adjust the threshold value.
Run the Visual Recognition Service action manually
If you prefer manual use, activate the Visual Recognition Service action:
- In Media Processing, select a folder for the recognition service.
- Right-click the folder name > Settings to open the folder management. Then select the Actions tab.
- In the Select Actions to Use in this Folder panel, add the Visual Recognition Service option to Selected Actions.
- Click Save.
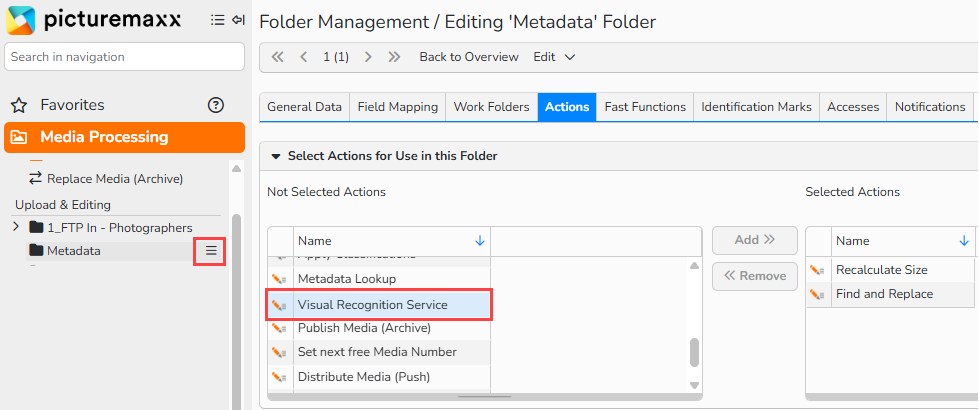 Folder settings: add the Visual Recognition Service action
- Visual Recognition Service now appears under the Metadata Actions menu in the folder.
- Select the images you want to process and click Visual Recognition Service in the Metadata Actions menu.
- Configure the action and click Save Settings (use requires charge).
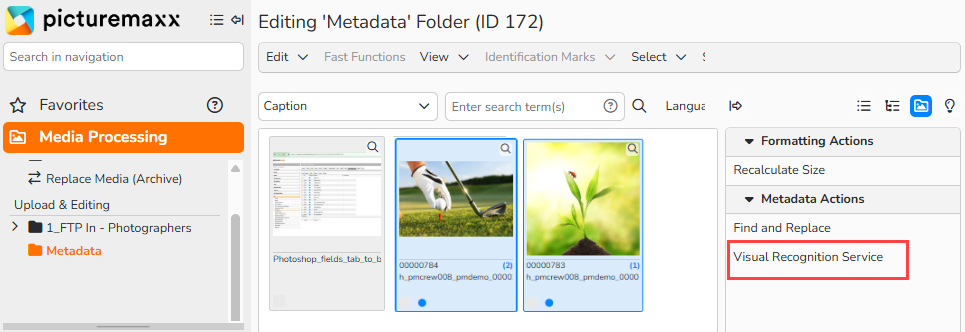
Media Processing: Apply Visual Recognition Service to selected images
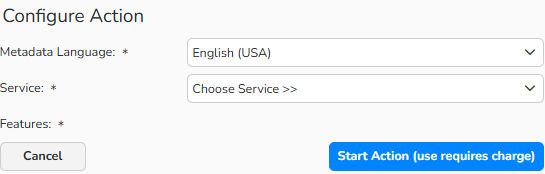
Configure the Visual Recognition Service action
Activate the translation option
Some features return recognized terms only in English. See Administration > Visual Recognition Service > the Services and Pricing tab for details.
If you enable the translation option and select "German" for the feature, Google Translate will automatically translate all terms into German. Additional costs apply and are listed under Administration > Visual Recognition Service > Activation.
To use the translation option, enable activate translation option and click Save.
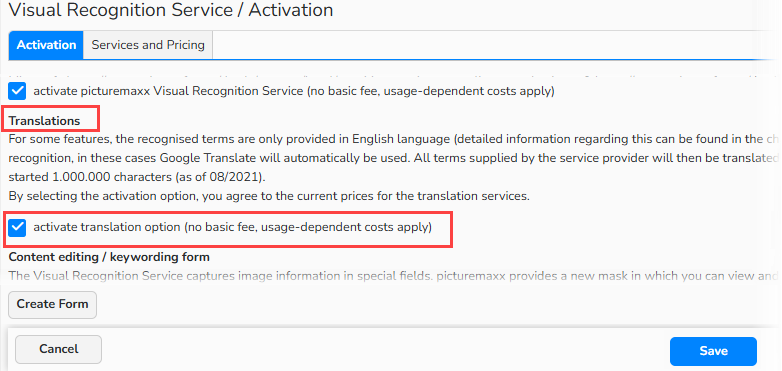
Activation tab: enable translation options
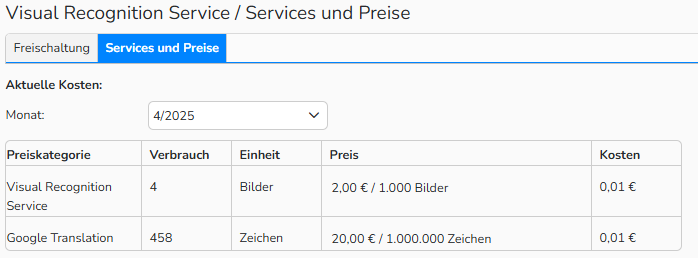
Services and Prices tab: Overview of the costs incurred for the service so far.
The translation service uses the language defined in the action run or in the action settings in Media Management > Action Runs. For features that return terms exclusively in English, language selection is only available if the translation option is activated. Without activation of the translation option, language selection is limited to features that provide terms also in German.
Example of using the translation option
In Media Management > Action Runs, open the Visual Recognition Service record and scroll down to the Configure Action Run panel to view the settings.
Clarifi’s Food feature provides terms only in English.
- The translation option enables paid translation into German (Fig. 1).
- If the translation option is not activated (Fig. 2), language selection is not available for the Food feature, and the terms will be delivered in English.
- On the other hand, the Moderation feature, which also provides terms in German, allows language selection even without the translation option.
Fig. 1  |
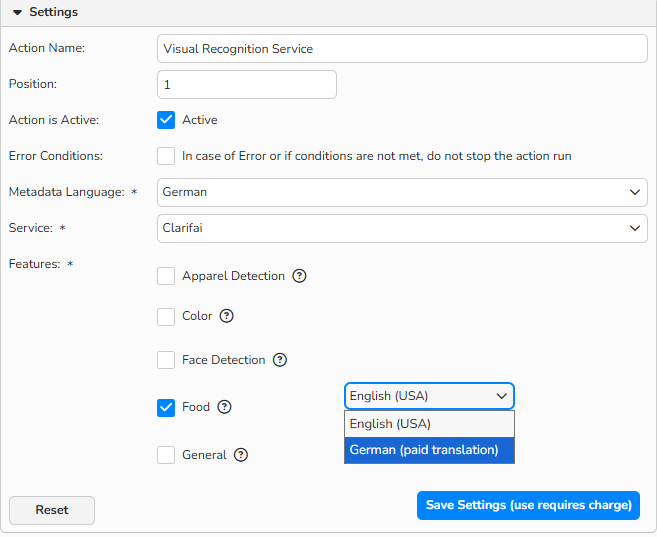 Translation option activated: language selection available |
|---|---|
Fig. 2  |
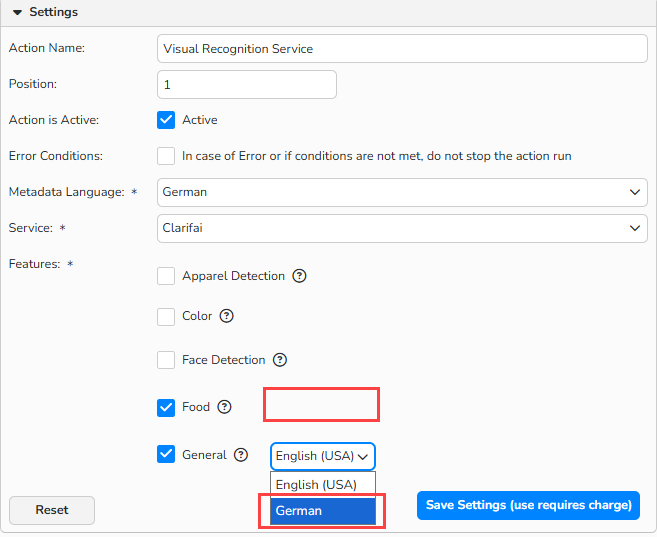 Translation option disabled: language selection is limited |
Review and edit labels
After running Visual Recognition Service, the system adds labels to the search index if their confidence score exceeds the threshold defined in the corresponding database field. These labels − terms and values identified by the service − can be then found when searching in the archive.
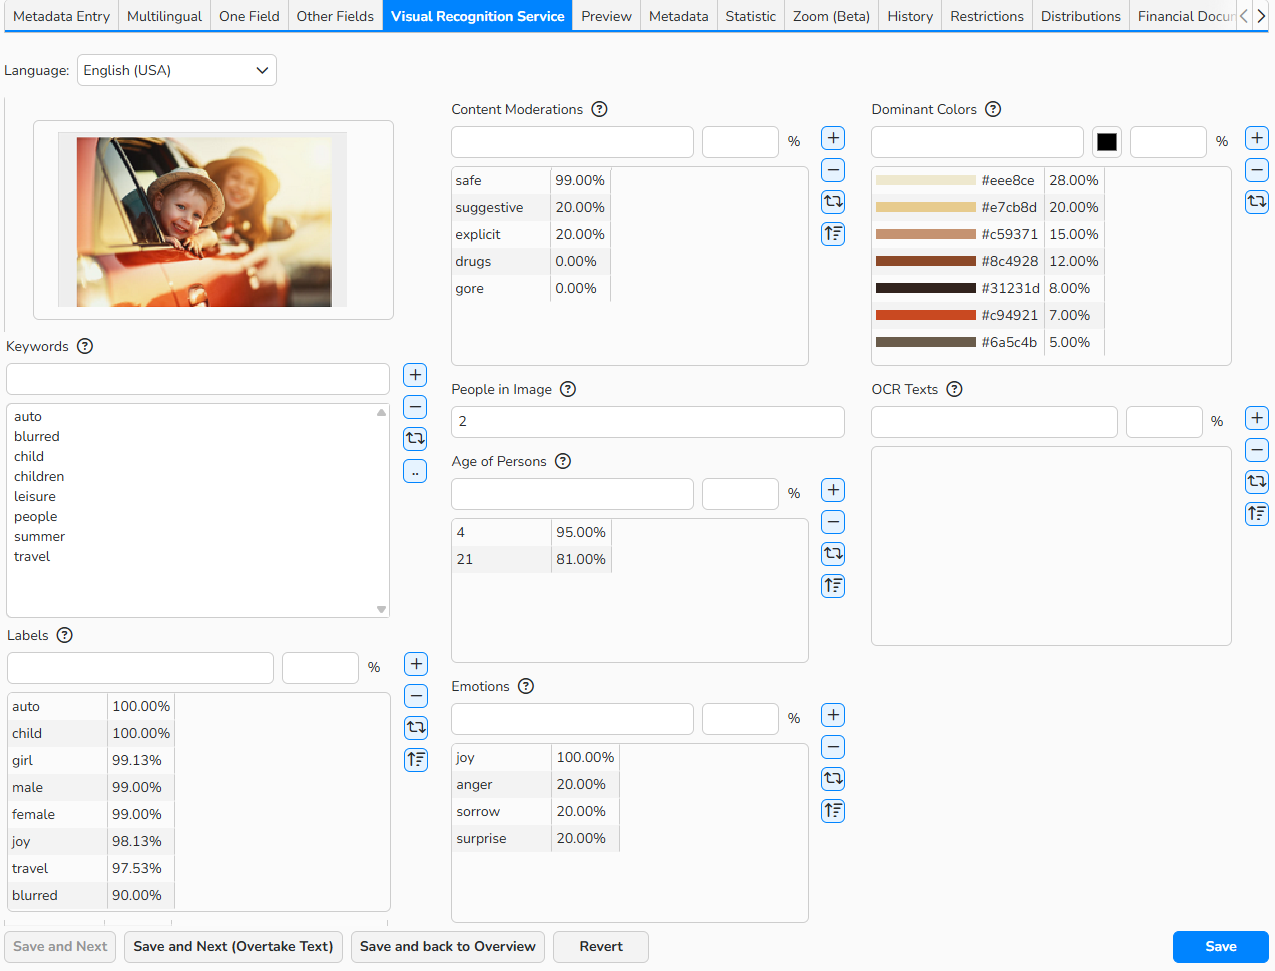
Media Processing > Visual Recognition Service tab: terms recognised by the service
Each metadata field has a content-specific threshold, which may differ from one field to another.
To view the threshold for a particular field, hover over the question mark icon in the metadata interface.
If you wish to modify a threshold, feel free to contact us.
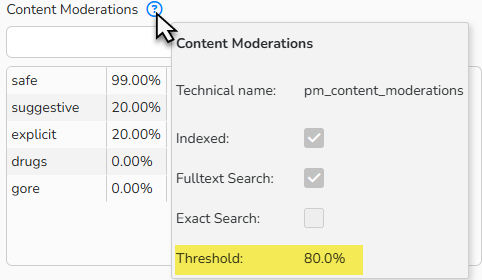
Tooltip: View confidence score threshold
To edit the assigned labels and the confidence score manually:
- Select an image where the service is applied.
- Switch to the Visual Recognition Service tab or to a custom form you’ve set up for the service. Here you can:
- Add labels:
- In the Labels field, enter a suitable term.
- Manually define a confidence score for the term.
- Press Enter to save the term.
- Add labels:
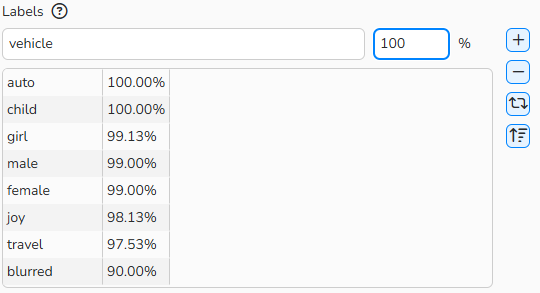
Edit labels and confidence scores
- Edit labels
- Select the Label you want to edit. The term will appear in the input field where you can modify it.
- You can also adjust the confidence score - for example, to push a term above the defined threshold to include it in the search index.
- To save the term, either press Enter or click the
 icon (Replace) to substitute it with a new one.
- Edit dominant colors
- Select the Color you want to edit
- Double-click the Color field to open an additional menu for defining and adding additional colors.
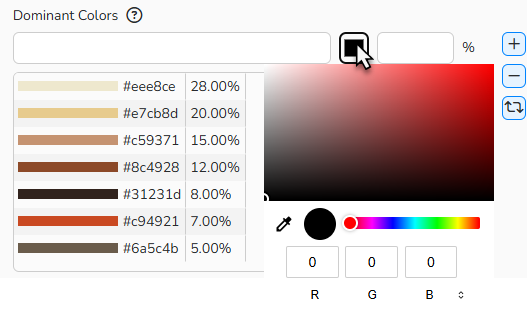
Edit dominant colors
- Delete Labels
- Select one or more Labels and click the
 icon (Remove).
- Select one or more Labels and click the
- Copy Labels to Keywords
You can transfer all terms - whether automatically identified by the Visual Recognition Service or manually added - into the keywords list.- Select the terms you want to copy. Multi-selection is available.
- Click the
 icon (Copy selected to Keywords).
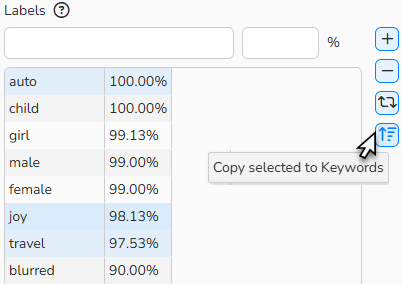
Copy selected labels to keywords
Note
Do you have any further questions?
Please contact our support team by email at support@picturemaxx.com if you have any additional questions or if we can assist you with using the Visual Recognition Service..