
Marketing
Download as PDFOverview
To carry out your marketing and sales activities effectively, you can assign custom groups, industry sectors, and characteristics to your sales and purchasing master data. This makes it easy to run campaigns, send newsletters, or generate reports based on this information.
Your system already includes default groups, which you can adjust or expand at any time.
Create groups, industry sectors, and characteristics
Follow the steps below to create groups in your Backstage. Later, by assigning them in the master data, you can generate group-based evaluations of your customer, author, or partner records.
- Navigate to one of the following areas:
- Marketing > Data Categorization > Groups
- Marketing > Data Categorization > Industry Groups
- Marketing > Data Categorization > Characteristics
- In the Overview window, select Edit > New.
- Enter the name of the group, industry sector, or characteristic in the Name field.
- Optional: Provide a name for each language you have in the system.
- Select the master data areas where the new group, industry sector, or characteristic should be available.
- Click Save.
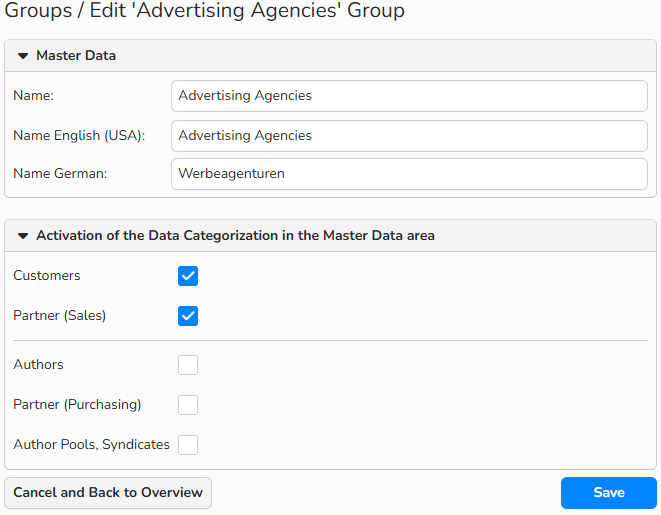
Marketing > Data Categorization > Groups: Group set up window
Note
If you have multiple active languages under Administration > Language Settings > Languages, the input form will have more Name fields. This lets you enter a name for the group, industry sector, or characteristic in each active system language.
Assign groups, industry sectors, and characteristics in master data
To use groups, industry sectors, or characteristics for marketing activities or evaluations, first assign them in the master data. Proceed as follows:
- Navigate to one of the following areas:
- Sales > Customers
- Sales > Partners
- Purchasing > Authors
- Purchasing > Partners
- Purchasing > Author Pools, Syndicates
- In the Overview window, and open a master data record.
- To assign the information to several records, multi-select them and click Edit > Batch Process.
- In the master data record, open the Marketing subtab.
- In Available Groups / Industry sectors / Characteristics, select the desired items and click Add to assign them to the selected record.
- To remove assigned items, use the Remove button.
- Click Save.
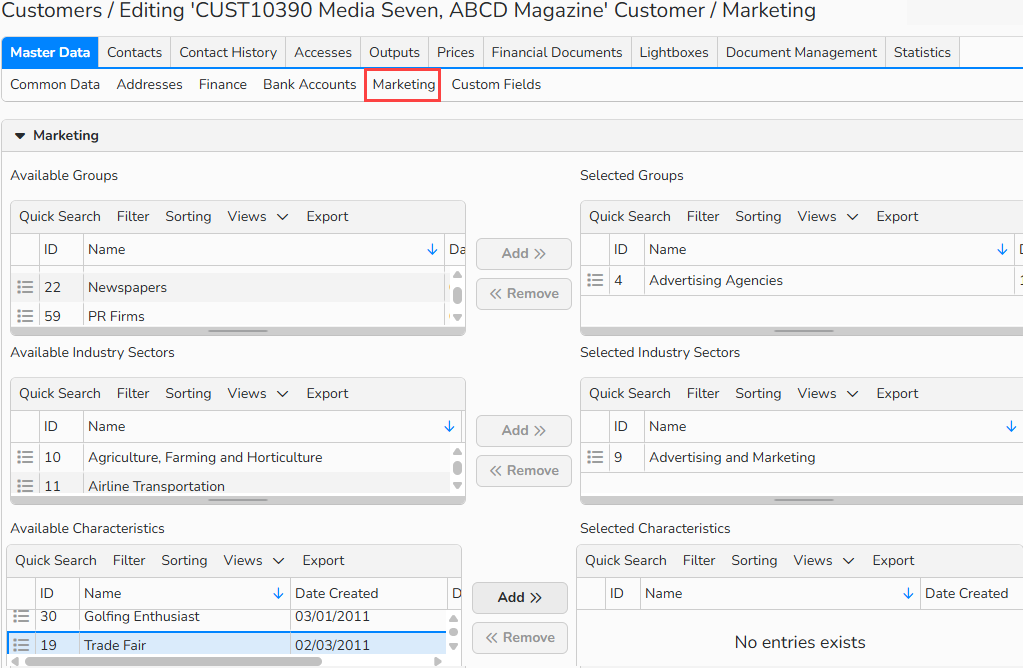
Customer master data > Marketing subtab: Assign groups, industry sectors, or characteristics.
Tip
Export data
Use the Export function within the data table to quickly export address and contact data and process them externally. For detailed instructions, see Advanced Table View.
Manage groups, industry sectors, and characteristics
You can view this marketing-related information in Marketing > Data Categorization > Groups / Industries / Characteristics. In a corresponding Overview window, proceed as follows:
- To create a record, click Edit > New.
- To edit a record, select it and click Edit > Open.
- To copy a record, select it and click Edit > Copy.
- To delete a record, select it and click Edit > Delete.
- To apply changes to multiple selected records at once:
- In the overview, multi-select the records you need to edit.
- Continuous selection: Press Shift + Click
- Non-continuous selection: Press Ctrl + Click (Windows) or Cmd + Click (Mac)
- Click Edit > Batch Process
- In the overview, multi-select the records you need to edit.
Note
You can use the table’s built-in tools to search, filter, and sort records. For more details, including how to create custom views and export data, see Advanced Table Views.
Tip
Import data
If you need to integrate a large number of marketing groups, industry sectors, or characteristics, please contact support@picturemaxx.com. We will provide you with migration templates to fill out and return for a smooth import.