
Discount Groups
Download as PDFOverview
Categorize your sales customers and partners, and define different discount groups and percentages for loyal buyers. These can be assigned individually in the master data and are automatically applied as discounts during invoicing.
Create discount groups
To define discount groups for your sales master data records, follow these steps:
- Go to Finances > Prices > Discount Groups and select Edit > New.
- Enter a name for the discount group in the Name field.
- Enter the discount percentage you want to grant this group.
- Click Save.
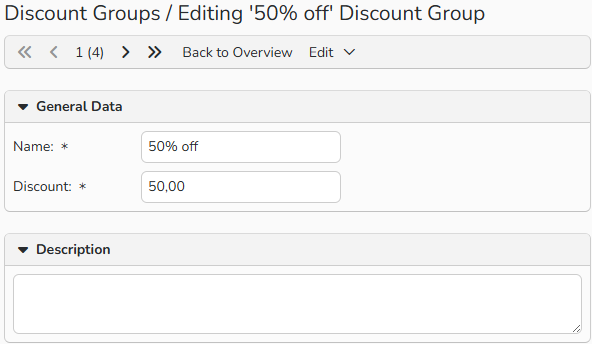
Discount Group setup window
Assign discount groups in Sales master data
You can assign a discount group to each of your customer and sales partner master data records. When you issue an invoice to that customer or partner, the discount defined in the assigned discount group is applied automatically.
To assign a discount group to a customer or sales partner record, follow these steps:
- Go to Sales > Customers or Sales > Partners, and open a record by double‑clicking it or selecting Edit > New.
- In the Prices tab, go to the Special Prices panel.
- From the Discount Group dropdown menu, select a record to assign the customer to the discount group.
- Click Save.
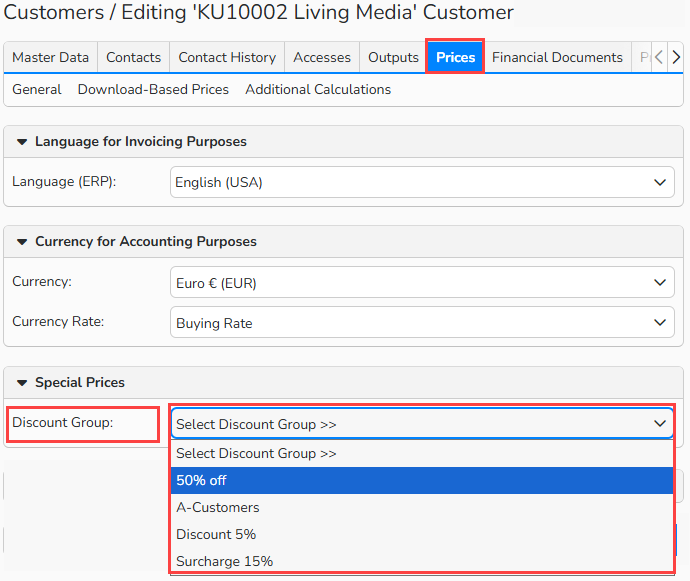
Customer master data window > Prices tab: Select a discount group
Tip
Use master data templates
If you often use the same settings for the Payment Terms section in the master data, you can create master data templates in Backstage under Finances > Templates > Financial Master Data.
When you create a new master data record, the relevant fields are automatically pre-filled with these default values.
Use discount groups in Invoices
When you create a document for a customer or sales partner, Backstage automatically applies the discount group assigned in their master data record.
To view or adjust the discount group in an invoice:
- Go to Finances > Invoices > Invoices and open an unposted document.
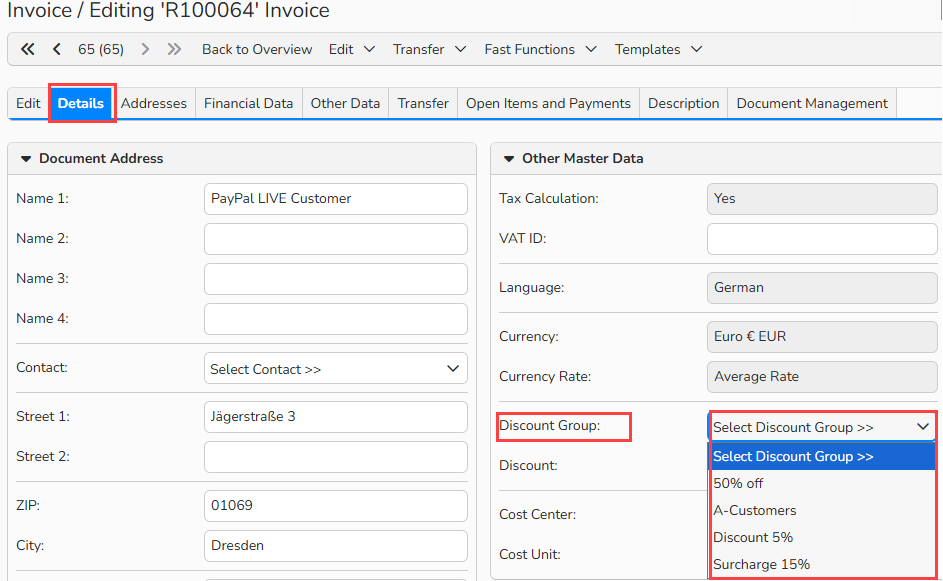
- Click the Details tab. This tab shows all billing information pulled from the master data, including the discount group. You can change the discount group here if needed.
- When you save the updated discount group, Backstage will ask whether you want to apply the discount to all items in the invoice.
- Select OK to recalculate all item amounts automatically.
_ _
_
Invoice window > Details tab: Select Discount Group
Alternatively, you can enter the desired discount directly in the invoice item list.
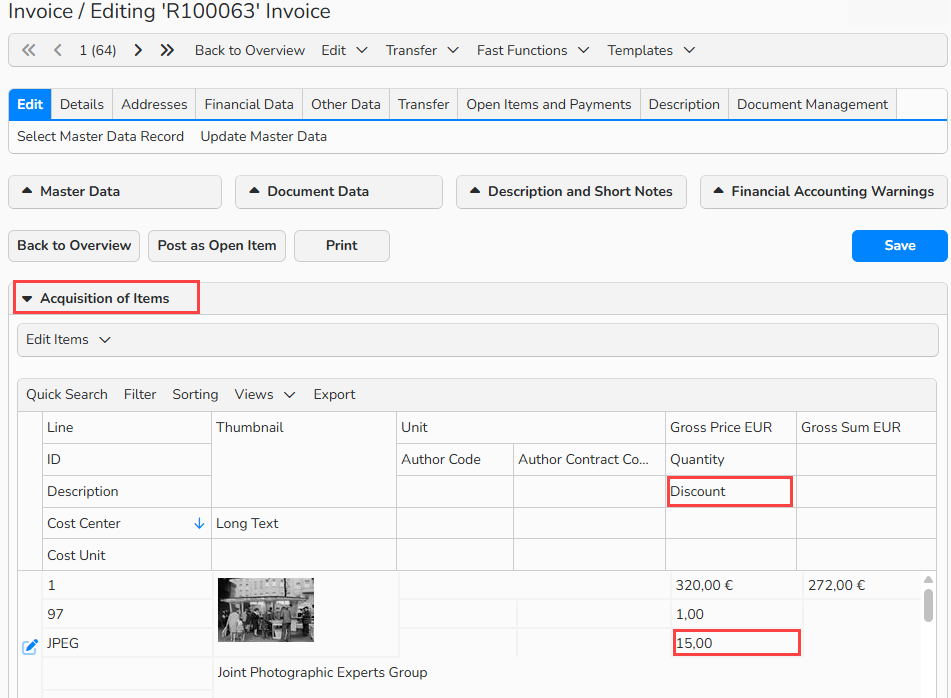
Invoice window: Specify a discount for an Invoice item.
Note
Learn more in Financial Document Creation.
Manage discount groups
You can find a list of all discount groups under Finances > Prices > Discount Groups.
Create a new record
- Select Edit > New.
Edit an existing record
- Double-click the record or select it and click Edit > Open.
Copy an existing record
- Double-click the record or select it and click Edit > Copy.
Delete a record
- Select the record you don’t need and click Edit > Delete.
Note
The integrated table functions allow you to search, filter, and sort records. For more information on these functions, as well as how to set up custom views and use the export function, see Advanced Table View.