
Currencies
Download as PDFOverview
Backstage allows you to select currencies across various areas. For example, you can choose between local and foreign currencies when creating accounting documents (Orders, Invoices, Sales Reports, etc.).
All recognized currencies are predefined in the system. You decide which ones are available for your company. To work with Backstage, you must define at least one default currency, which enables special functions.
Activate your desired currencies under Administration > Regional Settings > Currencies.
Once activated, the currencies are available in the following areas:
- Sales
- Purchasing
- Finance
You can also enter up-to-date exchange rates, including Buying Rate, Selling Rate and Average Rate.
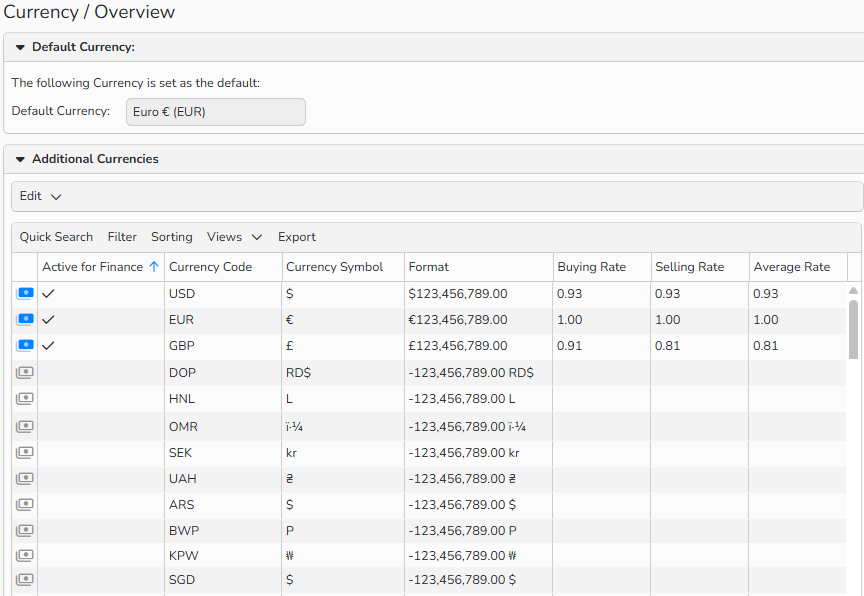
Currency overview: Default currency (EUR) and additional currencies (USD, GBR) defined as active.
Activate currencies
You can activate any number of currencies for use in Backstage. Once added, they become immediately available across various system areas.
Default currency
It’s essential to define a default currency, which will be automatically used on invoices and other documents. The exchange rate of any additional currencies you support will be calculated from your default currency.
To set your default currency:
- Go to Administration > Regional Settings > Currencies.
- In the drop-down menu, you will see a list of all available currencies, organized alphabetically by currency code.
- Select your default currency.
- Click Save.
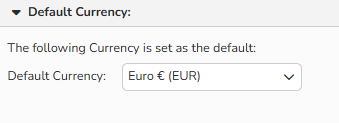
Default Currency dropdown menu
Note
You can change the format of your default currency under Administration > Regional Settings > Numbers, Currency, Date, Time. The system automatically activates the selected default currency.
You’ll find more information in the FAQ of the same name.
Additional Currencies
To use currencies beyond the default for billing or invoicing, follow these steps:
- Go to Administration > Regional Settings > Currencies and select the record from the table.
- Enable the Active for Finance option.
- Enter current exchange rates for the currency:
- Average Rate: The currency’s average exchange rate compared to your default currency.
- Buying Rate: The currency’s “Bid” exchange rate compared to your default currency. The rate at which buyers are willing to purchase the currency from sellers.
- Selling Rate: The currency’s “Ask” exchange rate compared to your default currency. The rate at which sellers are willing to offer the currency to buyers.
- Configure the desired format settings for the amounts. Examples show how your formats will appear.
- Click Save.
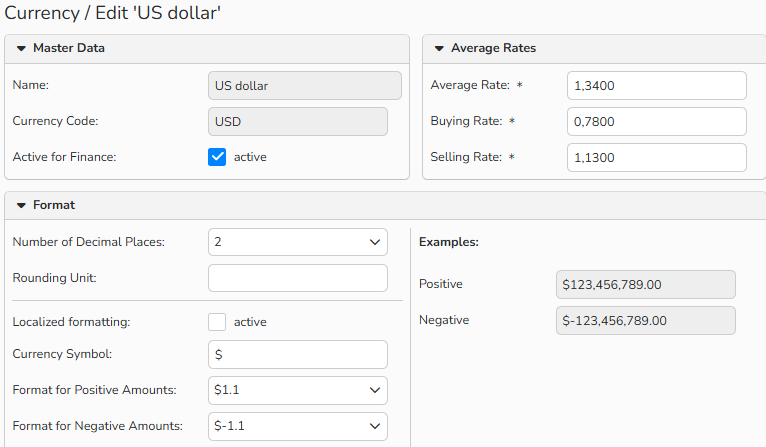
Edit Currency dialog
Assign currencies to master data records
You can assign specific currencies to your Sales and Purchasing master data records. Backstage will then use that currency automatically for pricing and billing.
To assign currencies:
- Navigate to Sales or Purchasing and open a customer, partner, or author master data record.
- In the Finance Data panel of the master data record, configure the mandatory ERP Currency and ERP Currency Rate fields accordingly.
- Click Save.
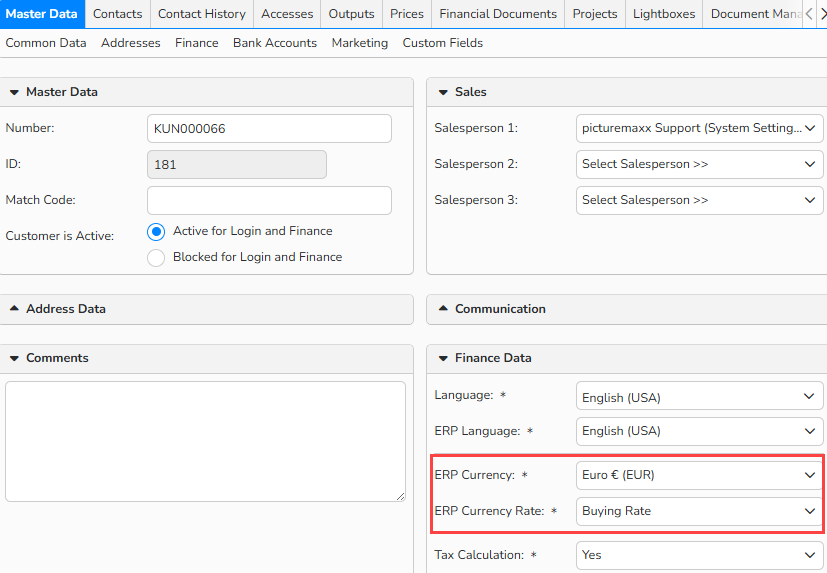
Master Data record > Financial Data panel: assign Currency and Currency Rate
Tip
Use Master Data Templates
Backstage requires you to complete all mandatory fields before saving a master data record.
To streamline this process, you can define master data templates under Finance > Templates > Master Data Templates. These templates help you prefill default values.
Manage currencies
Manage your currencies in Administration > Regional Settings > Currencies.
To edit currencies
- Double-click the record or select Edit > Open.
- Make the necessary changes. To deactivate a currency, disable the Active option.
- Click Save.
Note
Use the built-in table functions to search, filter, and sort currency records. To show or hide columns of data, hover your mouse over a column header to reveal the contextual menu _ ._
._
Above each table are the following options:
- Quick Search – Enter a search term.
- Filter – Define criteria for selecting specific records.
- Sorting – Determine the order in which the data is displayed.
- View – Store your settings.
- Export – Download all or selected records as a TXT file.
For more information, refer to Advanced Table Views.