
Handout: FTP Client for photographers
Download as PDFOverview
Photographers need an FTP tool to upload their files to Backstage. You can use any FTP application, but FileZilla works seamlessly with Backstage.
This article explains how to transfer image files to Backstage with the FTP client Filezilla. You can also access the download section there.
Download and install Filezilla
- Go to the Filezilla homepage: https://wiki.filezilla-project.org/Main_Page.
- Click on Download in the Quick Links section.
- Download the version recommended for your operating system and install it.
Set up FTP connection
- Open Filezilla and access the Site Manager by clicking the
 button.
 - Enter the connection details you received from your agency for uploading the files:
- Host (= Server name)
- User name
- Password
- Encryption: Select _Use explicit FTP over TLS _if available
- Logon Type: Select Normal
- Click Connect.
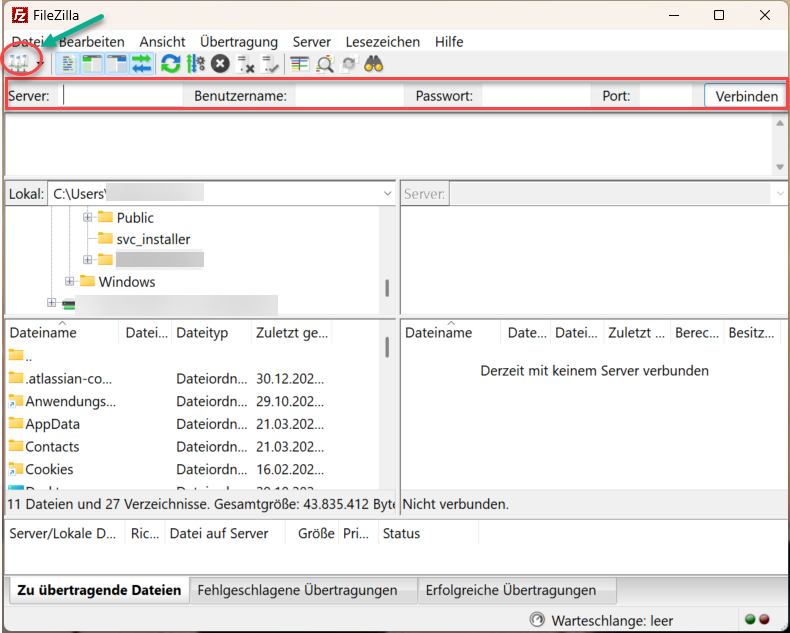
FileZilla: create connection
Once connected, you’ll see your local data on the left and the FTP server data on the right.
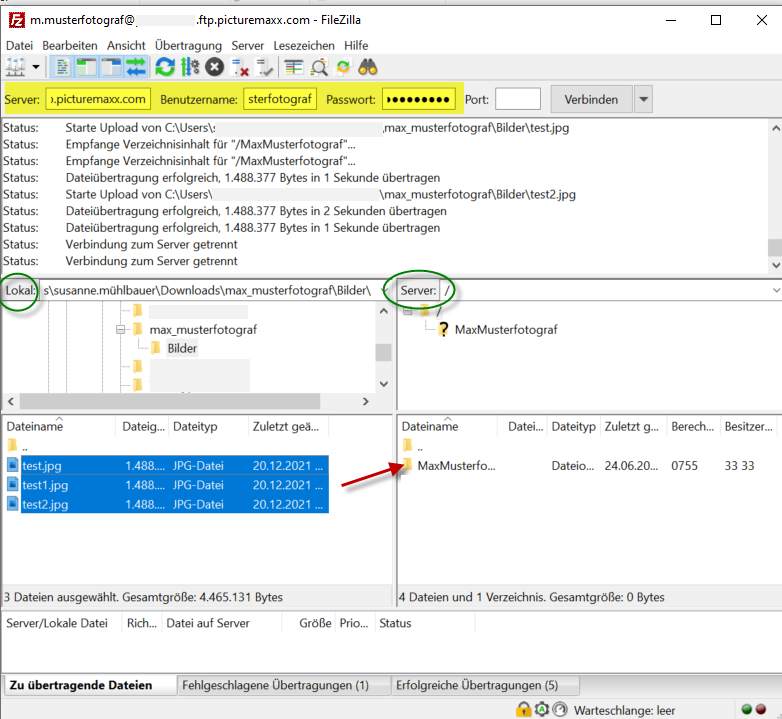
FileZilla: overview with created connection
Transfer your files
- On the left side (Local site), navigate to the folder where your image files are stored.
- On the right side (Remote site), navigate to the Backstage directory where you want to upload the files.
- Drag and drop the files from the left panel to the right panel.
Disconnect
Once the transfer is complete, click the button  to disconnect from the server and to close the FTP connection.