
Automated Website Emails
Download as PDFOverview
Set email defaults for your website. Choose the sender address for all automated emails, specify who receives copies after media downloads, and define where new‑registration notifications are sent.
Create an email address
In Backstage, you can define email addresses for various situations in your webshop. Some emails serve purely as notifications, while others require follow‑up actions.
To configure the email address settings, proceed as follows:
- Navigate to Web › Settings › Email Addresses
- Optional for multiple websites: from the Website dropdown, select the site for which you want to configure email settings.
- Enter email addresses into the corresponding fields:
- Sender of all System Emails
Specify the email address and name to use for automated emails, such as IP lock notifications or fee inquiries. - Download Emails
Enter the email address and name of the person who should receive a copy of all ZIP download emails sent to customers. - User Registration
When a new user registers, their data is stored under Sales › Webgate › New Customers, and the user receives a confirmation email.
Define the email address and name that should receive notifications for each new registration.
You can also specify a reply-to email address for these messages. - My-Account Page Changes
Enter the email address to use when changes are made to a customer account.
- Sender of all System Emails
- Click Save.
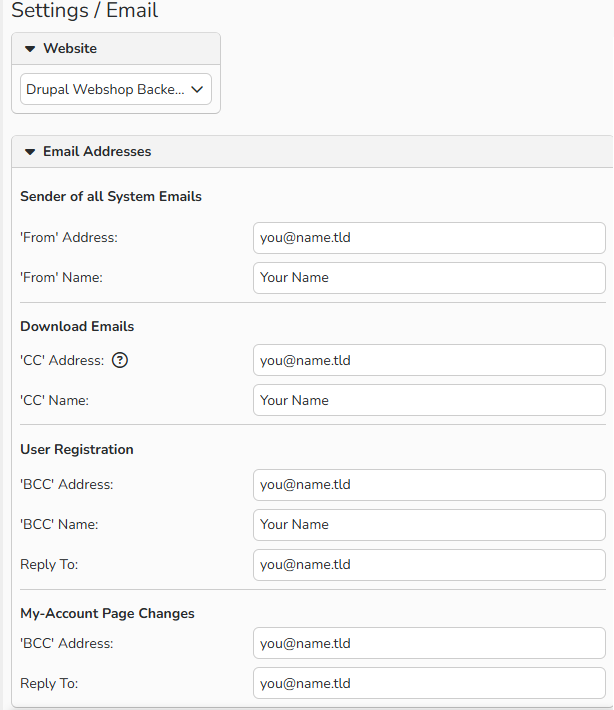
Website email setup window
Note
Separate multiple addresses with a comma.
Note
Most system emails are hardcoded, so you can’t edit them through the GUI.
If you want to change a system email template, contact us at support@picturemaxx.com and tell us the text you want us to add.
Example of an automatically sent email
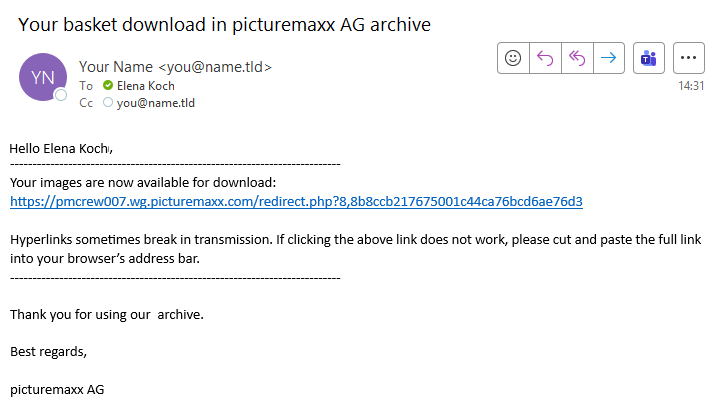
Example of an automatically sent email