
Sales Reports
Download as PDFOverview
At the end of each month, you can generate sales reports for your media suppliers with the click of a button. You can automatically generate Sales Reports for your suppliers (Authors and Partners) based on posted payments (invoice items), metadata (Author Code), and Contract details linked to each media file.
Before you start
Before generating sales reports, ensure the following steps are completed in Backstage:
- Set up authors (photographers).
- Create an upload folder.
- Configure and assign an action run to the upload folder.
Note
Refer to Media Delivery by New Photographer for detailed instructions on configuring these steps.
Enter contract details (only for photographers without full rights)
The contract linked to a media file sets the license fees the photographer earns from selling that file. Therefore, you must conclude a contract for each photographer who does not provide entirely their own content.
The first contract you create is the photographer’s standard contract and it is associated with all their media files. If necessary, you can create additional contracts with different conditions and then assign different contracts to different media files.
To specify contract details and contract terms:
- Navigate to Purchasing > Authors and select a photographer record from the overview.
- In the photographer’s master data, select the Contracts tab.
- In the Settlement Period filed, specify the payment frequency for the photographer.
- Sometimes photographers have a small amount of fees, in this case you can set a threshold for generating a sales report. To apply this, enable the Limit Settlement option and define the minimum payable amount.
- Click Save.
- Click the Contract Terms submenu.
- Select Edit Contract Terms > New.
- Leave the Contract Number field blank. The system will automatically populate it based on your number range settings under Administration > Company Settings > Number Ranges.
- In the Name field, enter a descriptive name for the contract (for example, 40% Standard Contract – Jim Smith).
- Note: A descriptive name is especially important if a photographer has multiple contracts.
- In the Contract Date field, enter the date when the contract should take effect.
- In the Contract Terms panel, enter the percentage or fixed fee that the photographer is entitled to for each media file sold under this contract.
- Click Save.
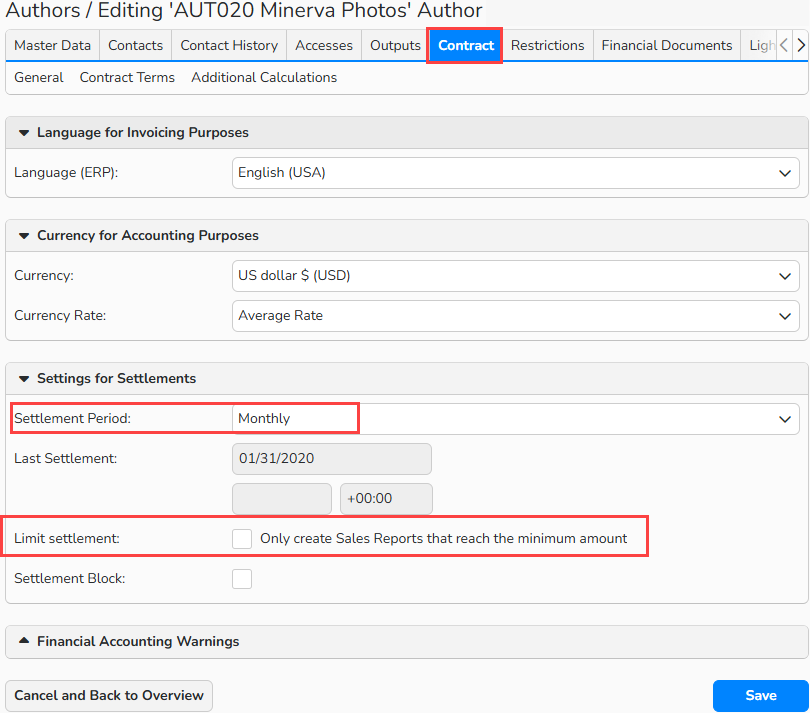
Author’s master data > Contract tab
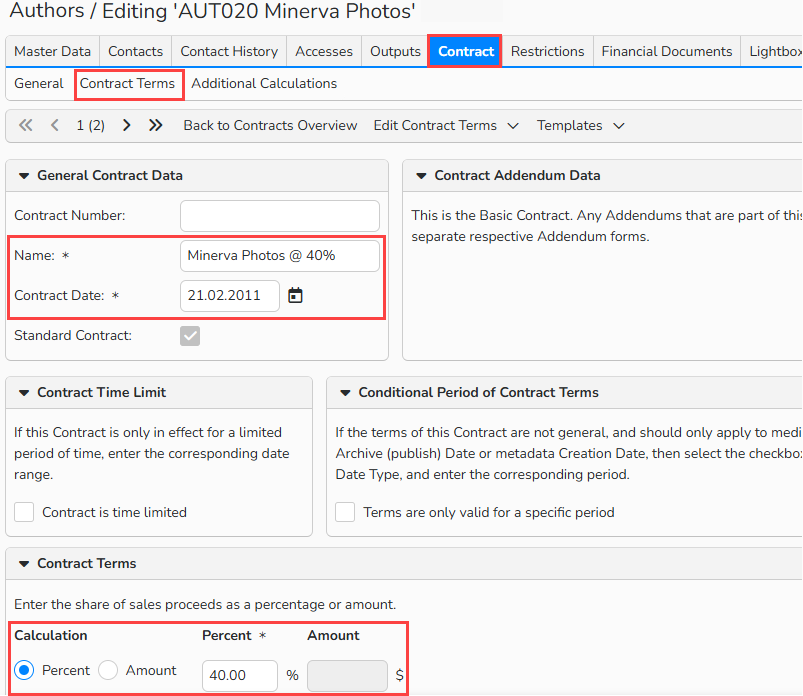
Author’s master data > Contract tab: Contract terms
Tip
If necessary, contracts can be more complex, with date restrictions, exceptions based on metadata, and so on.
Set up country restrictions (Optional)
To set up restrictions for the photographer (for example, they can only be distributed in the United States):
- In the author’s master data, switch to the Restrictions tab.
- Select Edit Author Restrictions > New.
- The Restrictions dialog will guide you through the settings depending on the selected restriction type.
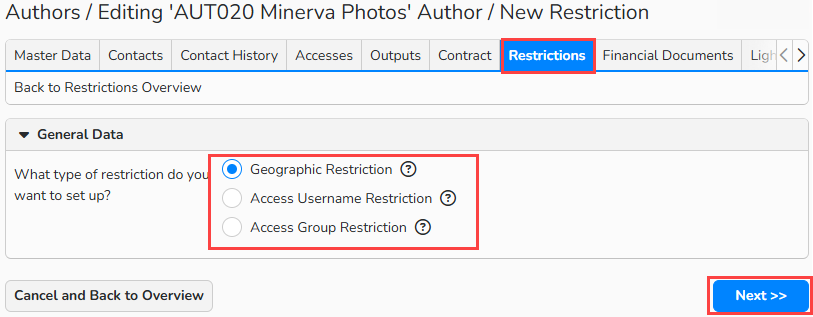
Author’s master data > Restrictions tab
Note
If you need assistance with configuring specific rights, contact us at support@picturemaxx.com
Generate sales reports
To initiate a settlement run and generate a sales report, follow these steps:
- Navigate to Finance > Sales Reports > Settlement Run.
- In the Settlement Date field, set the date that will appear on the sales reports.
- In the Settlement Period panel, specify the Settlement Periods for which to generate the reports. These must match the Settlement Periods selected on your supplier Contracts.
- To generate additional Sales Reports for suppliers that have already been settled within the chosen periods, enable Settle already-settled suppliers again.
- In the Master Data Range field, you can limit the Sales Reports to a specific group of suppliers by entering their master data number range.
- In the Settlement Criteria panel, you can manage how partial payments are handled. These are relevant if you post partial payments against open Invoices:
- Select Combine partial payments for a single Item into one entry to avoid listing each payment separately in sales reports.
- Select Only settle Items that are 100% paid if you want sales to appear in a supplier’s sales report only after the item is completely paid.
- You can choose whether to enable or disable the Distribute overpayments option for certain scenarios.
- Select the Settle all Items radio button to include every item with payments posted within your specified date range.
- Select Only settle the specific Items that are currently selected, and then select the individual Items that you want included in the Report.
- To preview which images will appear in the sales reports, click View Selection.
- After finalizing your settings, click Generate Sales Reports to begin automated document creation. The process may take several minutes, depending on the data volume. You can tell if the run is completed by switching to the Completed Settlement Runs tab.
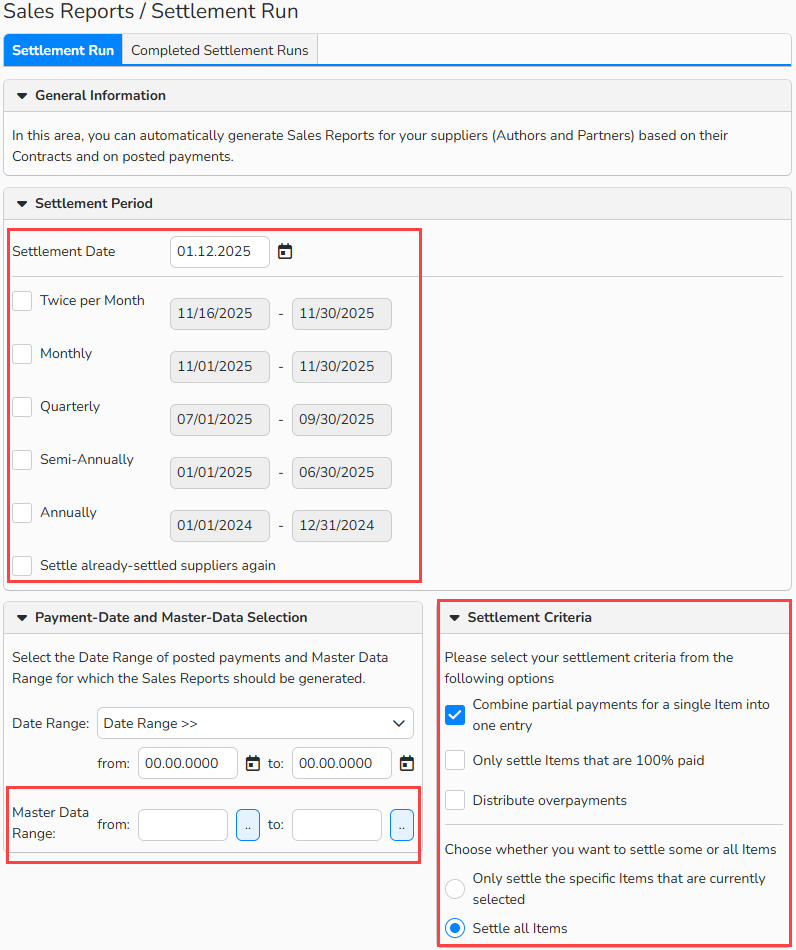
Sales Report > Settlement Run configuration
Tip
In the Completed Settlement Runs tab, you can review which settings and date ranges were used for previous run.
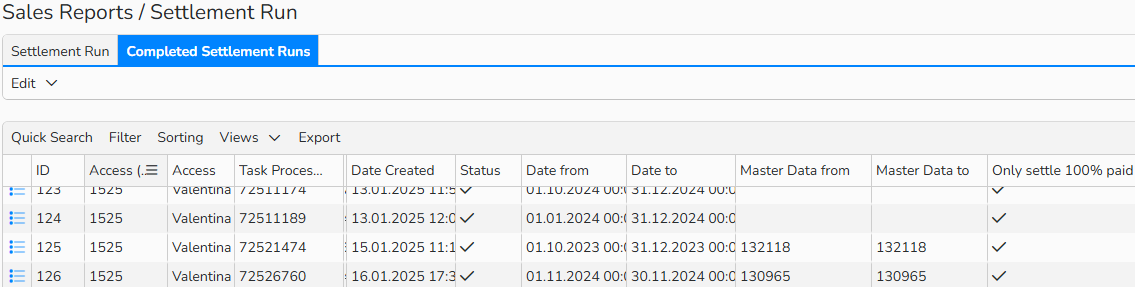
Overview of Completed Settlement Runs
View, manage, and post generated sales reports
All automatically generated sales reports are listed under Finance > Sales Reports > Sales Reports.
To view the details of a statement, open the document either by double-clicking it or by selecting Edit > Open.
Customize views
You can create custom views, similar to invoices, to display all the fields you need.
- To see all the positions (line Items) in sales reports in one view, change the View menu to Line Items.
Edit sales reports
If needed, you can manually adjust sales reports; for example, to add additional Items.
Post sales reports
Once sales reports are finalized, you can post them to Finance > Open Item Management > Open Items and Payment (Edit > Post Financial Documents).
Important
After you post a financial document, you cannot edit it.