
Media Upload and Folders in Media Processing
Download as PDFOverview
Organize folders in the Media Processing area to create your own folder structure. This will help you streamline your internal routine and automate it with a variety of actions to capture, edit, manage, and distribute your media files.
Customize your workflow so that it is aligned with your needs and the needs of your content providers, distribution partners, and end users.
Uploading media
To upload media, select the folder in which you want to save the media. Folder management is described in the following chapters.
To upload media to the selected folder for the first time, navigate to Media Processing > Upload & Editing > Choose the folder / Upload.
- Add new media using drag & drop or use one of the two Add Media buttons.
- Transfer the media by clicking on the Upload all Files.
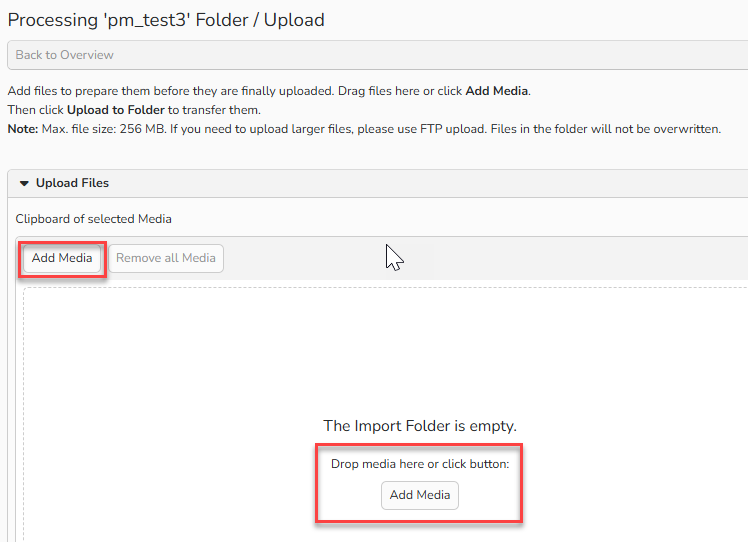
Media processing > Editing folder / Upload > Upload Files panel > Add media
If there is already media in the selected folder, go to Edit > Upload Media.
- Add new media using one of the two buttons, Add Media or Drag & Drop.
- Transfer the media by clicking on the Upload to folder button.
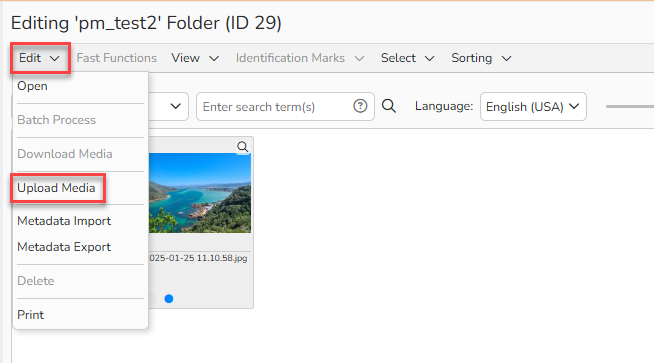
Media processing > Editing folder > Menü Edit > Upload Media
Note
It is possible to upload media via FTP. For more information, please refer to the FAQ Media delivery by new photographer.
Types of folders
Backstage gives you a tree-like structure of parent folders and subfolders that makes organizing your media simple and intuitive.
In Media Processing and Media Management > Folder Management there are two types of folders:
 Main folders: Each main folder represents an input channel to your Backstage.
You can arrange main folders in a tree-like hierarchy and configure the settings: metadata field mapping, standard and rule-based actions for media processing, fast functions, identification marks, and access rights. Work folders: Work folders are created within a main folder and inherit its settings. The system automatically generates work folders when an entire folder is imported via FTP. You can also create them directly in Backstage, for example, to group media files.
Tip
Planning the folder structure
As you design your folder structure, consider the following criteria:
- types of media you’ll import on a regular basis;
- sources of media files (for example, regular content providers, freelance photographers, etc.);
- processes and actions you want to run on the files;
- folder structure for the FTP server. See Accesses below.
A typical folder structure in Backstage is organized by author and/or by purchasing partner. This way, you can tailor the settings that are specific to each author/partner and their media.
Create a main folder
To create a main folder:
- Navigate to Media Processing.
- Hover over a main folder’s name in the tree to view the context menu icon. Or simply right-click the folder.
- In the context menu, select New Folder or New Subfolder.
- Enter a Name for the folder and click Save.
-Or-
- Navigate to Media Management > Folder Management > Main Folders.
- In the Overview, select Edit > New.
- Enter a Name for the folder and click Save.
After saving, other setting tabs become available for you to define how the folder will process media. The settings are grouped into the following tabs:
General Data
Define the general folder settings and the folder’s place in your folder structure:
- Name: Enter a descriptive name for the folder.
- Folder is Active: Enable the option to make the folder available in Media Processing and to allow uploading via FTP or directly in Backstage.
- Parent Folder: To assign the new folder as a subfolder, select a parent folder with the lookup icon. If you want the new folder to be a top-level folder, keep the default No parent folder option.
- Comments: Add notes (optional)
Field Mapping
A folder’s Field Mapping defines how Backstage maps metadata from imported files (set in Administration > Formats > Media Types) to database fields (set in Administration > Database Fields > Media).
- From the Field Mapping Templates menu, select a template for field mapping to apply during import:
- IPTC/XMP: Read the IPTC data and fill in missing IPTC content with XMP.
- XMP/IPTC: Read the XMP data and fill in missing XMP content with IPTC.
- Alternatively, you can set up custom field mapping in one of the two ways:
- Option 1: Select database fields via drag and drop
- Drag a field from the View Media’s Original Embedded Metadata panel (right side) into the corresponding field in the Field Mapping panel (left side). This will assign the embedded metadata of the media to the metadata fields.
- Option 2: Select database fields from the system
- In the Field Mapping panel (left side), click the lookup button next to a mapping field. The Formats/Media Types dialog opens.
- In the dialog, choose a media format tab and select the corresponding field.
- Option 1: Select database fields via drag and drop
Note
By default, all fields are empty (unassigned)
This means the system will not import any metadata into the folder until you map the fields.
If you need languages other than German or English, add them manually.
Tip
Create templates
You can also save individual configurations as templates:
- Configure your individual field mapping.
- Select Field Mapping Templates > Save Template.
- All saved templates are listed under Media Management > Templates > Field Mapping.
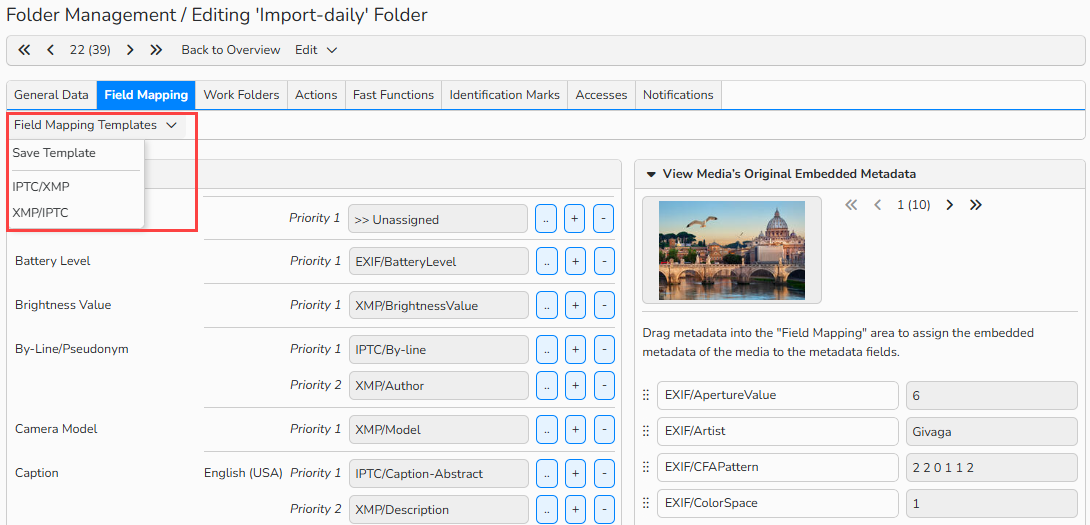
Main Folder settings > Field Mapping tab: Field Mapping Templates menu
Work Folders
Since work folders do not have their own settings but inherit them from their parent main folders, this tab is used only for management.
- To remove a work folder, select it and then click Edit Work Folder > Delete.
- You can select multiple items at once:
- To select a continuous range of data, press SHIFT + Click
- To select a non-continuous range of data, press CTRL (Windows) or CMD (Mac) + Click.
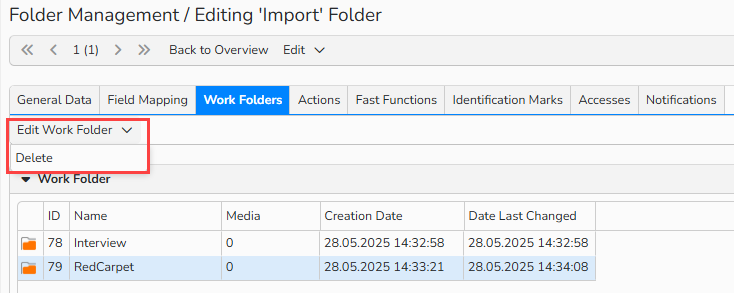
Main Folder settings > Work Folders tab: Edit Work Folder menu
Important
If you delete work folders that contain media files, the files are moved to Trash.
Actions
Specify which actions shall be available in the folder or which action runs shall the system automatically execute during media import.
- Action is a specific procedure for processing media. Standard actions include Replace and Edit, Delete Original Data, Publish Media (Archive), etc.
- Action run is a custom sequence of actions. Set action runs under Media Management > Action Runs. For more information, refer to the Actions and Action Runs FAQs.
To activate Actions / Action Runs / Action Run Groups:
- Select items from a corresponding panel and click Add to make them available in the folder.
To activate Automatic action run that auto processes new media files during import:
- Select an action run from the Use Automatic Action Run on Newly Uploaded Media dropdown to execute it automatically upon import.
- Click Save.
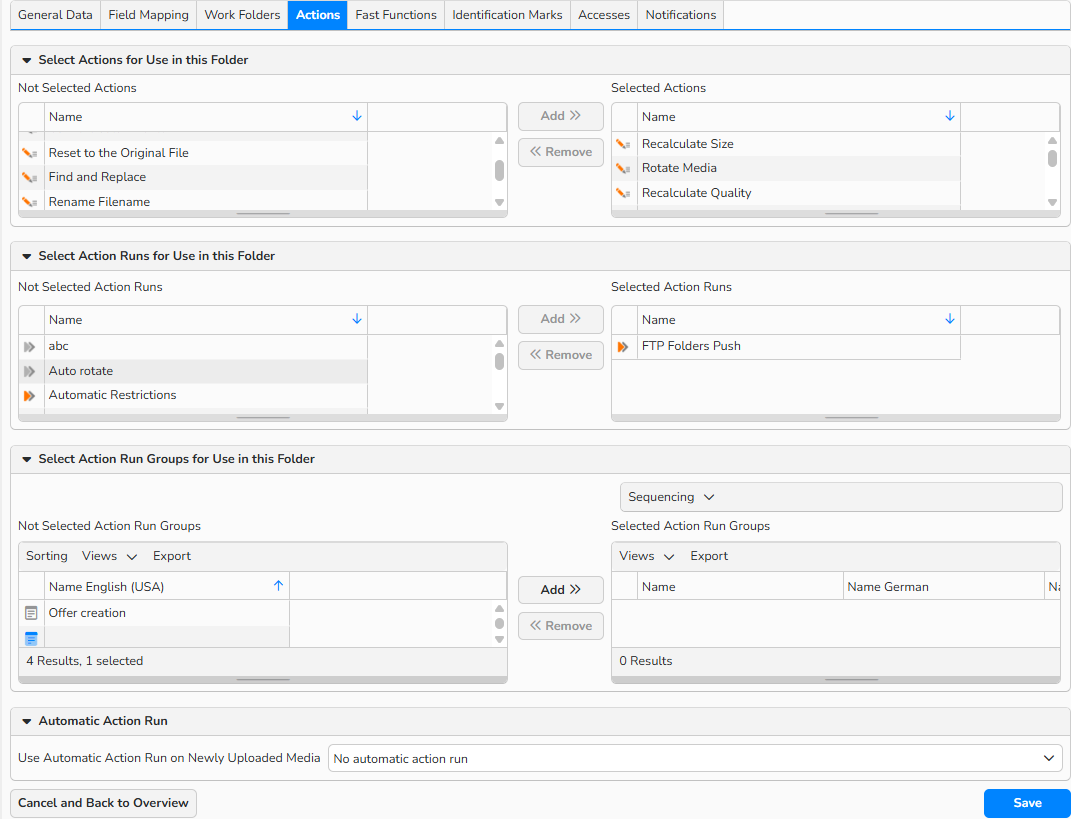
Main Folder settings > Actions tab
Fast Functions
Fast Functions are shortcuts that allow you to associate media files with new or existing Batch Restrictions, Website Collections, Series, or Offers directly from within your Media Processing area.
- From the list of unselected functions, choose the ones you want available in this folder and click Add.
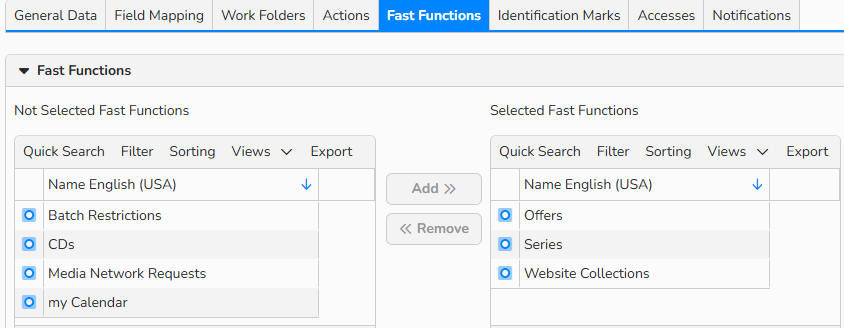
Main Folder settings > Fast Functions tab
Identification Marks
Identification marks allow adding info labels to media, for example, to denote the processing status of a file.
Set custom Identification Marks under Media Management > Identification Marks.
- From the list of inactive marks, select the ones you want available in the folder and click Add:
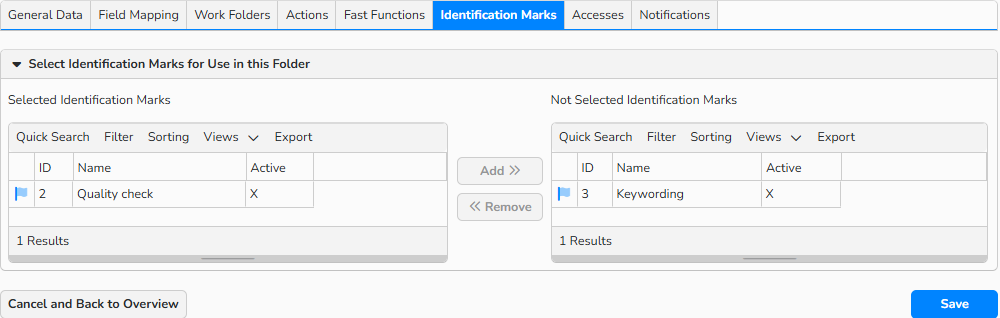
Main Folder settings > Identification Marks tab
Accesses
Here you can control which user accounts can view the folder in their media processing view and who is allowed to upload new media to this folder via FTP.
Activate access to folder for Media Processing
- Select individual Users and/or Access Groups and click Add to grant them the right to view the folder.
Activate Access to Folder for FTP Uploading
- Select Users and/or Access Groups and click Add to allow them upload media to the folder.
- When users with the Upload access log into Backstage via FTP, they will only see the folders that are available to them.
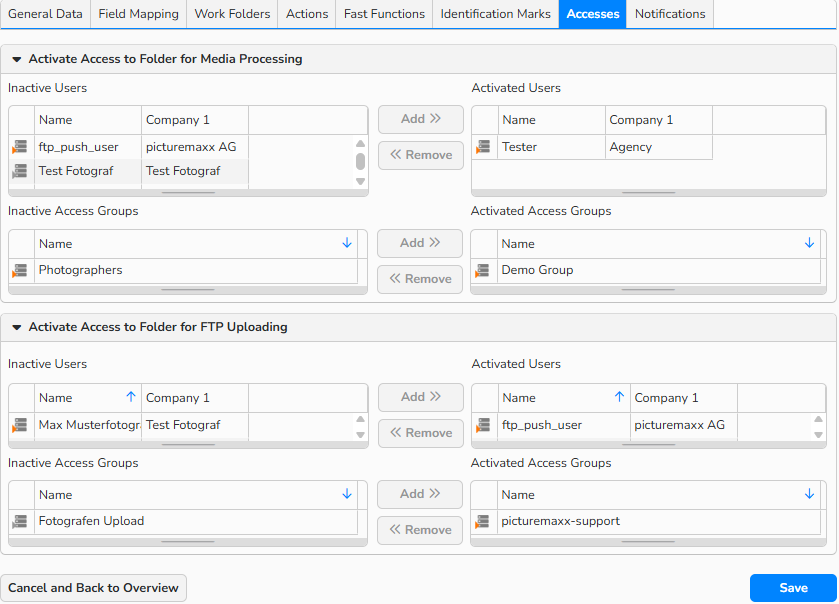
Main Folder settings > Accesses tab
Note
- Users with unlimited access can view all folders in Media Processing. They only need FTP upload rights.
- Users with limited access need to be granted permissions for specific folders and FTP upload.
- Main folders that allow FTP access always appear at the top level in the FTP inbox. To create a nested folder structure in the FTP inbox, organize it in Backstage using a main folder and nested work folders. Remember that work folders cannot have individual settings, action runs, etc.
Create a work folder
You can create work folders both manually in Media Processing and automatically during the FTP upload.
Create work folders in the Media Processing module
- In the folder tree, hover over a main folder to view the context menu icon. Or simply right-click a folder.
- Select New Work Folder.
Create work folders upon FTP upload
- When importing media via FTP, you can upload an entire folder of media files. A corresponding work folder is automatically created for each folder. The folders are listed in the Media Processing area.
Use folder context menu
In Media Processing, use the context menu to run folder-related functions and view folder’s media statistics.
Hover over a main folder and click the context menu icon, or simply right-click a folder.
Context menu options
| New Work Folder | Create a work folder within the selected parent folder. |
| New Folder | Create a main folder. |
| New Subfolder | Create a main subfolder within the main folder. |
| Mark all as read | Mark all media in the folder as read (not new). |
| Mark all as unread | Mark all media in the folder as new. |
| Move | Move the folder to a higher level or to another folder. |
| Deactivate | Hide the folder from Media Processing but not delete it. |
| Delete | Delete the folder and move all its media files to Trash. |
| Settings | Display the main folder’s settings. |
Display options (next to folder name)
| Show tally for all folders with work folders | Display the total number of all files in the folder including all subfolders. |
| Show the overall number of files in each folder | Display the total number of files within the folder. |
| Show the number of unread files in each folder | Display the total number of new (unread) files within the folder. |
| Show the number of files with errors in each folder | Display the total number of files within the folder that have Error status. |
| Highlight folders that contain unread media files | Mark the folders that contain new media. |
| Show files from all subordinate work folders | Display the total number of files within the main folder and its subfolders. |
Filter options
| Filter: Only show folders that contain files | Show only the folders that contain media files. |
| Filter: Only show folders that contain work folders | Show all folders that contain work folders. |
| Filter: Only show folders that contain unread media files | Show only the folders that contain new media files. |
Note
No matter what display options you select, the context menu for a selected folder will always show the following values: All Media Files, Unread Media Files, and Media Files with Errors.
Manage folders
Go to Media Management > Folder Management to manage your folders. Folder Management is broken down into Folders and Work Folders.
- To create a main folder, click Edit > New.
- To edit a main folder, select it and then click Edit > Open.
- To copy a main folder, select it and then click Edit > Copy.
- To delete a main folder or work folder, select it and click Edit > Delete.
- Select multiple items in a continuous range at once by holding the SHIFT key + Click.
- Select several non-continuous items by holding CTRL (PC) or CMD (Mac) key + Click.
Note
If you delete main and work folders that contain media files, the files are moved to Trash.