
Advanced Table Views
Download as PDFOverview
In almost all areas, Backstage displays data in a table. This allows you to easily manage and analyse the information.
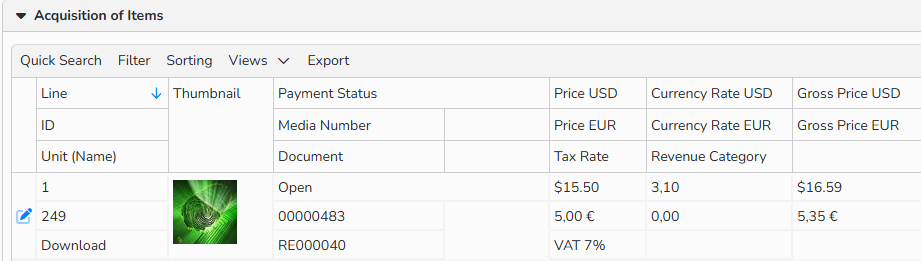
Custom tabular view of an Invoice
Note
The system saves your table view automatically and restores your previous settings when you log in.
Table View controls and features
The easy-to-use table features let you have a clear overview of your data and streamline your workspace:
- Arrange, add, or remove data columns.
- Sort and filter data with different parameters.
- Customize table views to fit your needs.
- Export all data effortlessly.
Quick Search
Quick Search helps you find specific data using search terms. You can search across all fields or limit the search to selected columns.
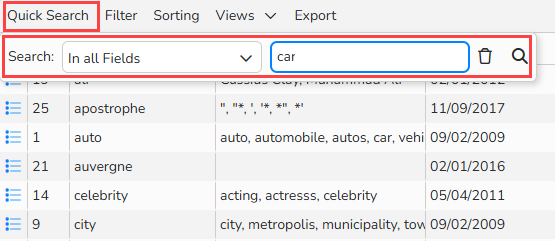
Quick Search: Search in all fields
Tip
Quick Search
Quick search keeps filtering your results until you clear it. To see all available results, click Quick Search, delete the search term, and confirm with Enter or the magnifying glass icon.
If the Quick Search element is blue, a search is active.
Tip
Use Wildcard Searches
Wildcards are special characters that help you search more flexibly by replacing one or more letters in your search term. You can use wildcards at the beginning, middle, or end of your search phrase.
Backstage supports two types of wildcards:
- a question mark (?) replaces any single character.
Example: m?n finds man, men - an asterisk replaces one or more characters.
Example: Los finds Los Alamos, Los Angeles, Los Cabos
Colo*r finds color and colour
Filters
Filter lets you create customized data views with multiple parameters. You can define complex conditions - ideal for recurring evaluations or detailed analysis.
Choose from several conditions to narrow down your results:
- Use Logic operators:
- AND – Include only results that meet all conditions.
- OR – Include results that meet at least one condition.
- Field: choose whether to search all available fields or limit the search to a specific one.
- Filter: define how to filter the table’s data with these options:
| contains | Find records where the selected field contains Text/Value. |
| empty | Find records where the selected field contains no data. |
| not empty | Find records where the selected field contains data and is not empty. |
| = | Find records where the field content exactly matches your input. |
| ≠ | Find records where the field content differs from your input. |
| < | Find records where the numeric value is lower than your input. |
| ≤ | Find records where the numeric value is equal to or lower than your input. |
| > | Find records where the numeric value is higher than your input. |
| ≥ | Find records where the numeric value is equal to or higher than your input. |
- Text/Value: Enter the value (a word, words, or number) to use it as the basis for the filter.
- Click the plus icon to add more parameters.
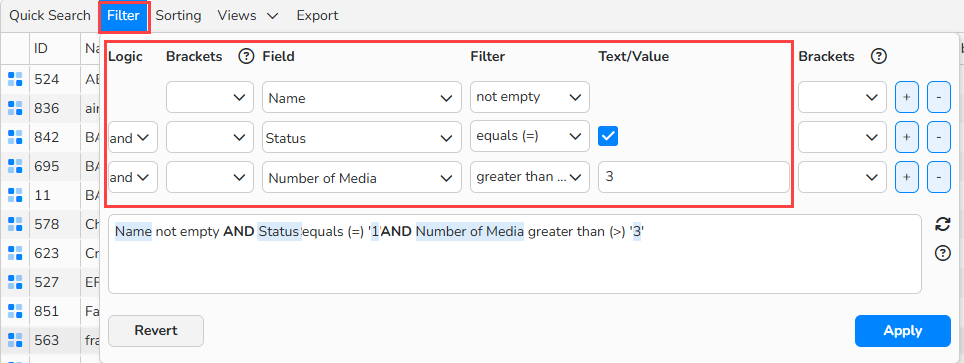
Table Filter: configure filtering parameters
Note
You can base your filter on any available data field, even if its column is currently hidden.
Sorting
Simple Sorting
Click any column header to sort the table data in descending order. Click it again to switch to ascending order. An arrow next to the header shows the current sorting direction.

Table Sorting: Click column header to sort the column data
Sorting by multiple fields
Use the Sorting menu to sort a table by multiple parameters. To define the sort order, you can select any number of fields – even hidden ones.
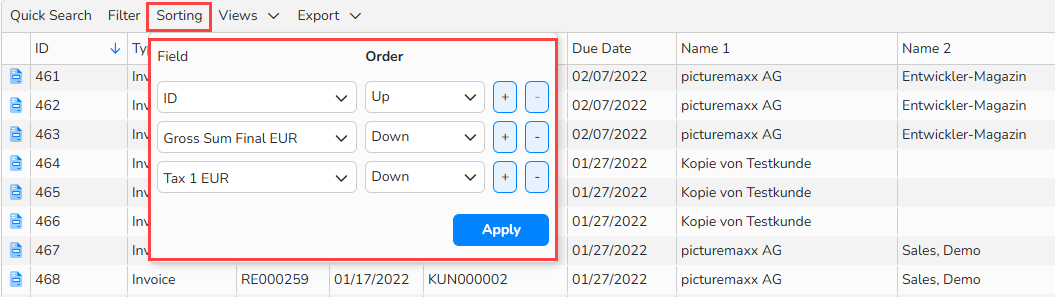
Sorting menu: configure sorting parameters
When you apply multi-field sorting, the table sorts top to bottom: first by the first field, then by the second field, and so on. This works similarly to a custom sort in a spreadsheet.
To remove multi-field sorting:
- Click any column header in the table view. This action replaces all previous sorting settings.
- Alternatively, open the Sorting menu, remove all criteria, and click Apply.
Configuring views
You can choose table layout options like single or multiple rows and decide whether the View is personal or shared with your team. To reuse table layouts and filters, save them as Views.
Configure table view:
- Click View > Configure.
- Enter a descriptive Name.
- Select Row Layout:
- Single Row: Displays each record in one table row.
- Add fields from the dropdown to customize your View. Use drag-and-drop or arrow icons to arrange them as needed.
- Multiple Rows: Stacks each record across multiple table rows.
- Add fields from dropdowns, add columns/rows with plus icons, use arrows to merge cells.
- Single Row: Displays each record in one table row.
- Click Apply.
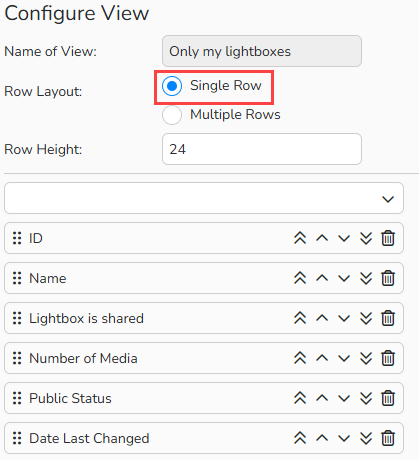
Configure table view: Single row
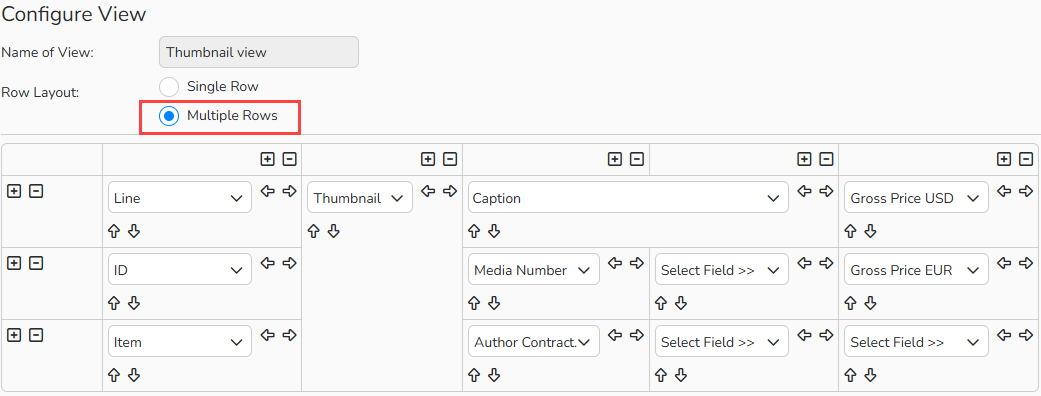
Configure table view: Multiple rows
Tip
Row Height
Row Height defines the height of table rows, with a minimum of 24 pixels. To display image thumbnails properly, use a larger value — we recommend 150 pixels. If the height is too small, thumbnails may be cut off.
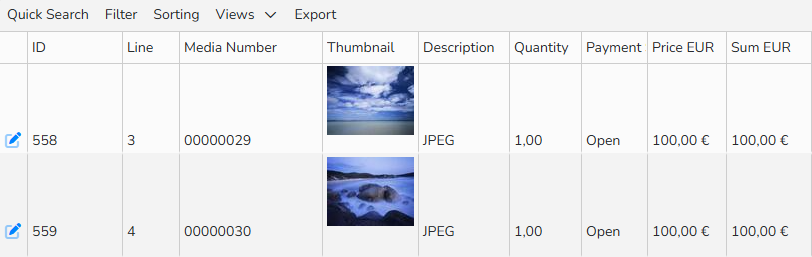 Table View: Row Height sufficient to display thumbnails
Save table view:
- Select Views > Save View.
- In the Save View dialog, enter a name for the View or select an existing name from Existing View to overwrite it.
- To make the View available to others, select the Available for all users option.
- All your Views are then available for selecting at the bottom of the Views menu.
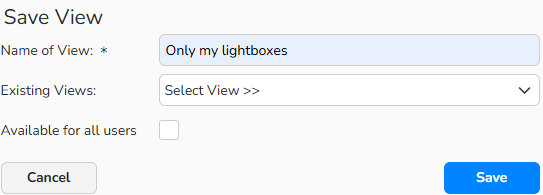
Save View dialog
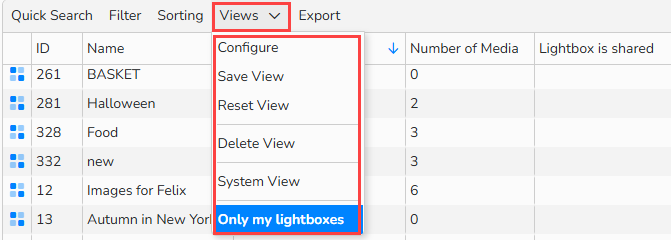
Views dialog: Views management options. A custom view is saved and available
Note
Each table view includes a predefined System View, which serves as the default. This view is accessible to all users and cannot be deleted.
Tip
If you've temporarily modified a table view, you can quickly restore the original by selecting Reset View.
Manage table views
- To create a new View, go to Views > Save View in the table menu.
- To manage existing Views:
- Select a view the Views menu.
- Click Views > Configure.
- Modify the view as needed.
- Click Save.
- In the Save View dialog, you can select a view from the Existing View dropdown to overwrite it.
- To restore a View to its original settings, select it in the View menu and then click Reset View.
- To delete a View, select the view from the list and click Edit > Delete.
Exporting table data
You can export any table view as a TXT file or Excel file. Define export and content settings and select any available database fields for export.
To export data from a table view:
- Click Export.
- In File Type, select the export file format.
- In the Field Mapping for the Export panel, select the fields you want to export. Add as many individual fields as you wish by clicking the plus [+] icon.
- Click Start Export.
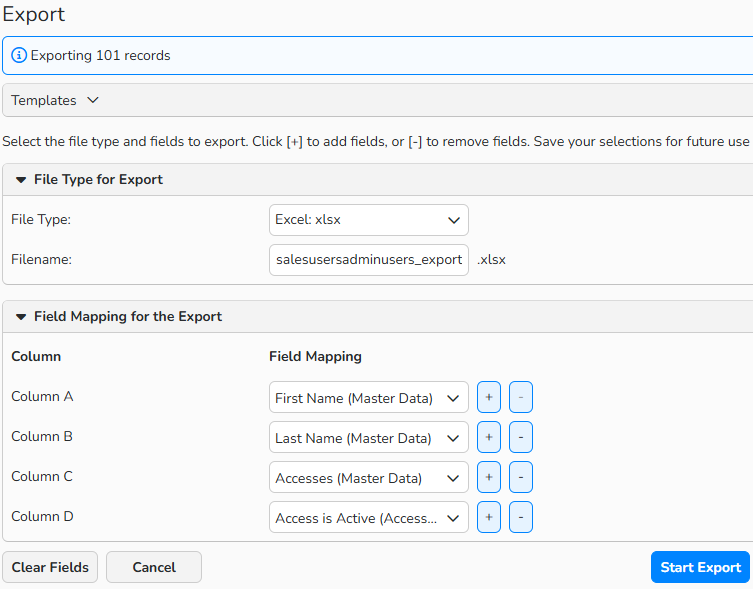
Customer overview: Export table data
Tip
Create Export Templates
You can save an export configuration as a template for future use. Click Templates > Save Template. To reuse the template later, open the Templates menu and select it.
Note
Use the same format settings (delimiter, enclosure character, encoding) when opening the exported file to ensure correct display.
Configuring columns of data
Use the context menu (right-click a column header and click the ☰ icon) to show or hide columns.
Select fields you want to display and disable those you want to hide. You can also rearrange the column order with the arrow icons.
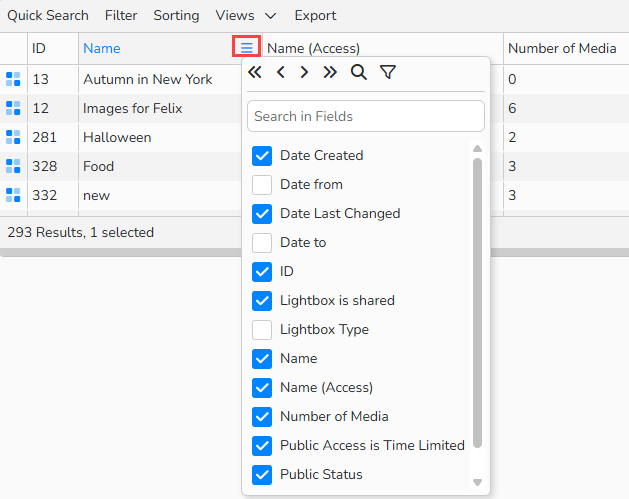
Table’s context menu
Tip
Batch Processing in Table Views
You can apply changes to multiple selected records at once:
- Multi-select the records you want to edit:
- Continuous selection: Press Shift + Click
- Non-continuous selection: Press Ctrl + Click (Windows) or Cmd + Click (Mac)
- Click Edit > Batch Processing.
Tip
Maximize Table View
Need more space to view columns? Hide the left navigation menu by clicking the arrow icon. Click again to restore the view.
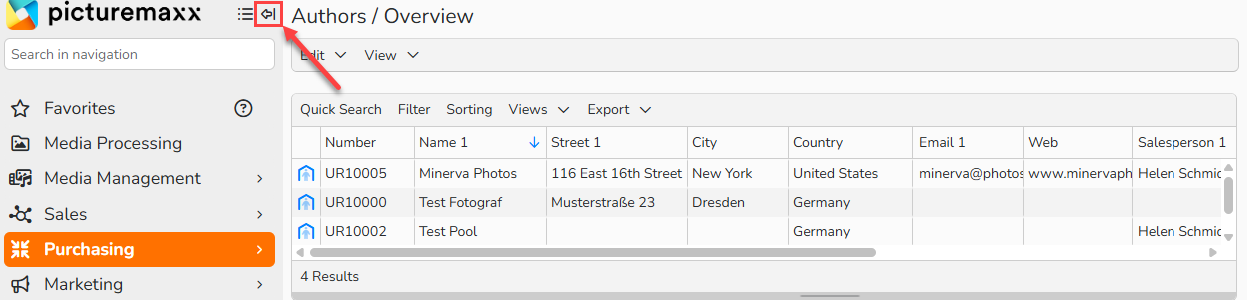
Hide Navigation Menu