
Watermarks
Download as PDFOverview
Backstage supports applying watermarks to thumbnail, preview, and high-res images. You can define different watermark sets for different data sources. The watermarks appear in the middle of your images and videos.
By default, picturemaxx offers a set of watermarks for all video sizes. You can replace those with your own custom watermarks at any time.

Watermark applied to an image
Create a set of watermarks for images
To create a new watermark set for your media files, proceed as follows:
Before you start
Prepare all watermark files externally, make sure they meet the following requirements:
- File format: PNG
- Color Mode: RGB
- Transparency: according to your preference
- Pixel size: no larger than the media to which the watermark is being applied. For previews, the longest edge is usually set to 800 pixels.
- Recommended value for Thumbnail: 80px
- Recommended value for Preview: 450px
- Recommended value for High-res: 2000px
Upload and set up image watermarks
- Upload the files to Administration > Templates > Document Management.
- In Administration > Media Attributes > Watermarks, select Edit > New and specify the following:
Master Data panel
- Name: enter an internal label for the watermark set.
- Use for images: make sure the option is enabled for image watermarks.
- Use for videos: inactive, because you can edit only the default set for videos provided by picturemaxx.
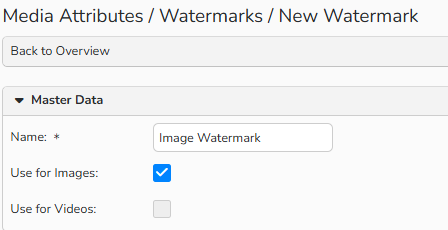
Watermark setup window: Master Data
Image watermark for archives and partner connections:
- Select marketing channel(s) to apply the watermark to:
- i-picturemaxx
- Webgate
- Partner Connections
- Choose one of the following options to specify whether to display the watermark based on data sources (your local Archive and partner connections), master data (Authors, Partners), or channels:
- Archives and Partner Connections
- Authors, Partners, Pools, and Syndicates
- Channels
- Select the data sources/suppliers/channels to associate with this watermark and click Add. To undo the selection, click Remove.
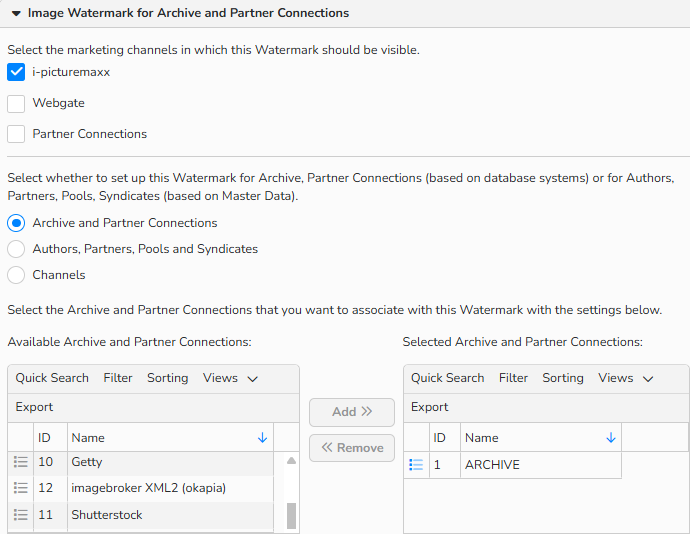
Watermark setup window: associate watermark with channels and data sources
Watermark for Thumbnail/Preview/High-res
Select a watermark file for each media size and click Save.
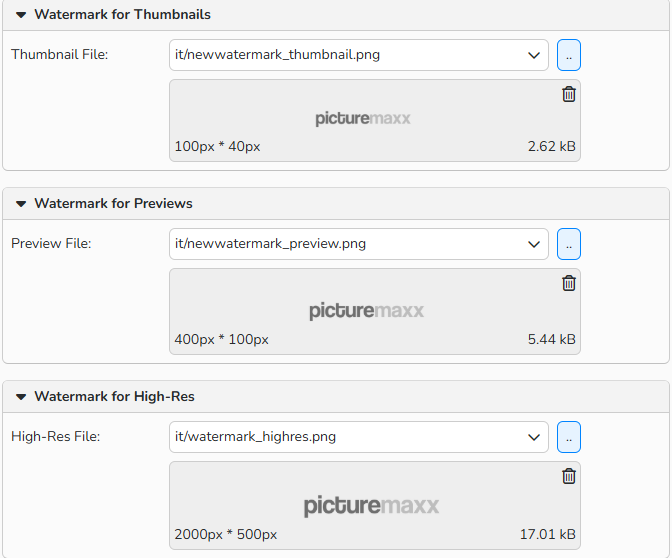
Watermark setup window: add watermark files for each media size
Note
Refer to Document Management to learn more about uploading the files.
Create a set of watermarks for video files
Backstage offers a pre-filled but customizable set with picturemaxx watermarks for video files.
Before you start
Prepare all watermark files for thumbnail and preview sizes externally, make sure they meet the following requirements:
| Video size | Thumbnail sizes in px | Preview sizes in px |
|---|---|---|
| 3:2 | 300x200 | 780x520 |
| 2:1 | 320x160 | 800x400 |
| 5:3 | 320x192 | 800x480 |
| 8:5 | 320x200 | 800x500 |
| 4:3 | 320x240 | 800x600 |
| 5:4 | 300x240 | 800x640 |
| 1:1 | 300x300 | 800x800 |
| 16:9 | 320x180 | 960x540 |
| 14:9 | 280x180 | 980x630 |
Upload and set up video watermarks
- Upload the files to Administration > Templates > Document Management.
- Go to Administration > Media Attributes > Watermarks.
- Double-click the Video Watermark row to open the set and configure the following:
Master Data panel:
- Name: enter an internal label for the watermark set.
- Use for videos: default option, you can edit only the video set preconfigured by picturemaxx.
Watermark for Thumbnail/Preview
In the Thumbnail and Preview columns:
- Select the desired format sizes from the drop-down.
- Select corresponding watermark files for each format size.
- Add or remove format sizes and watermark files with plus and minus icons.
- Click Save.
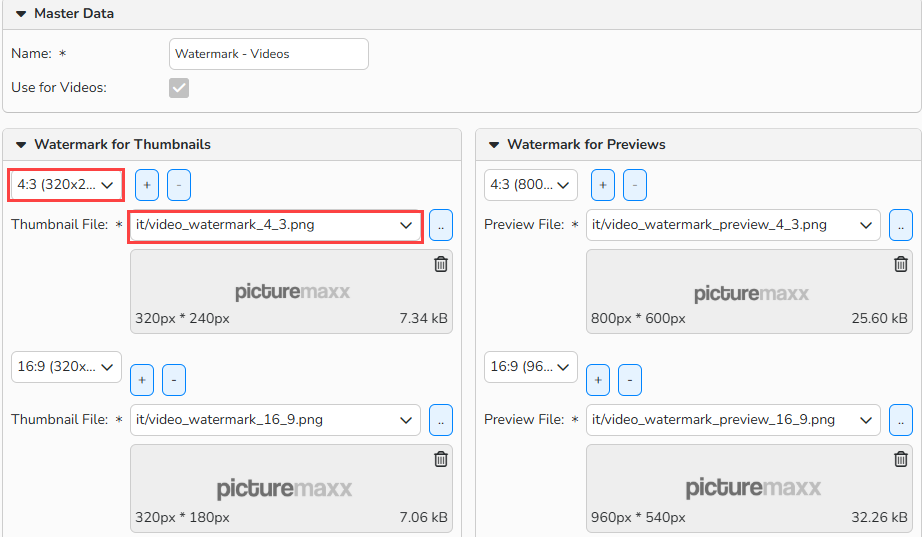
Watermark setup window: add watermarks for video assets
Note
You can set only one watermark for each video size. Refer to the instructions in the "Create a set of watermarks for Images" section above.
Define watermarking rules for specific users and user groups
Backstage lets you control who can view and download your media. You can set permissions for individual users or entire groups, ensuring that watermarks are automatically applied whenever they access or download a file.
Note
Find out more on how to set up and manage access groups in User Access and Permissions.
Set watermarking rules for Access Group
- Configure an access group with specific rights in a corresponding module: Sales (Customers, Partners), Purchasing (Authors, Partners, Author Pools, Syndicates), or Administration (Users).
- In an access group, select the appropriate options Show Watermark for thumbnail, preview and high-res sizes in the panel Access for Searching and Downloading your Media.
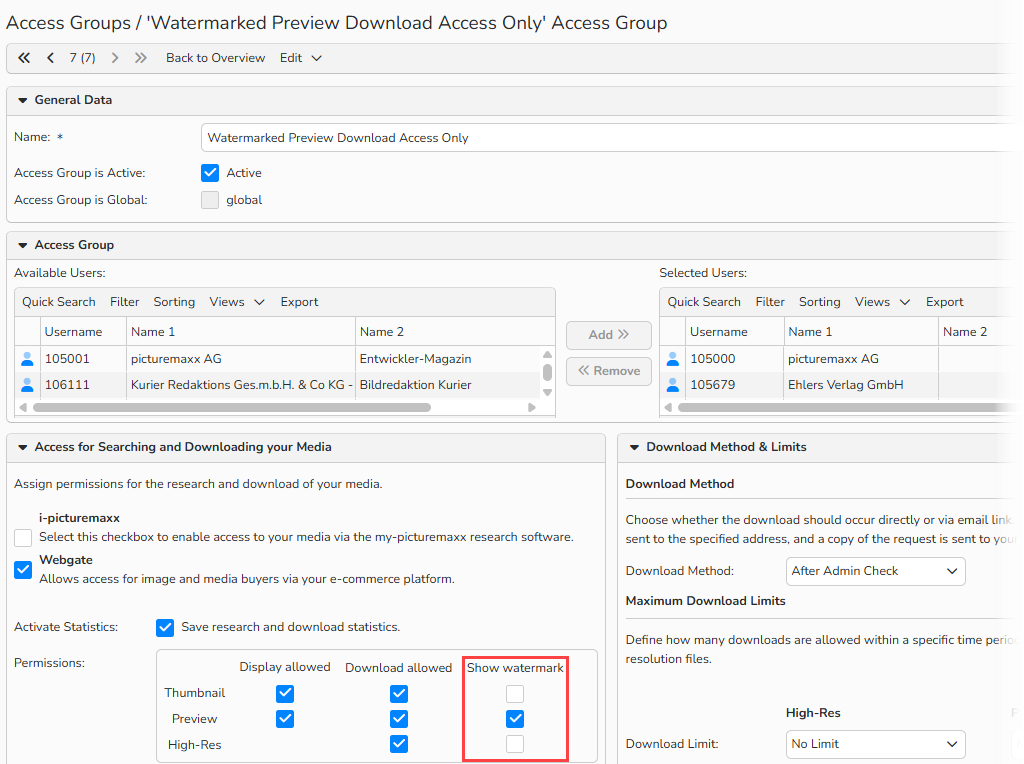
Access Group window: watermark configuration for Access Group
Override Access Group watermarking rules with individual rights
- Open the access record (Customers, Authors, Partners, or Users) in a corresponding module.
- In the Access tab, in the panel Access for searching and downloading your media, enable Override group permissions and select the desired options in Show watermark.
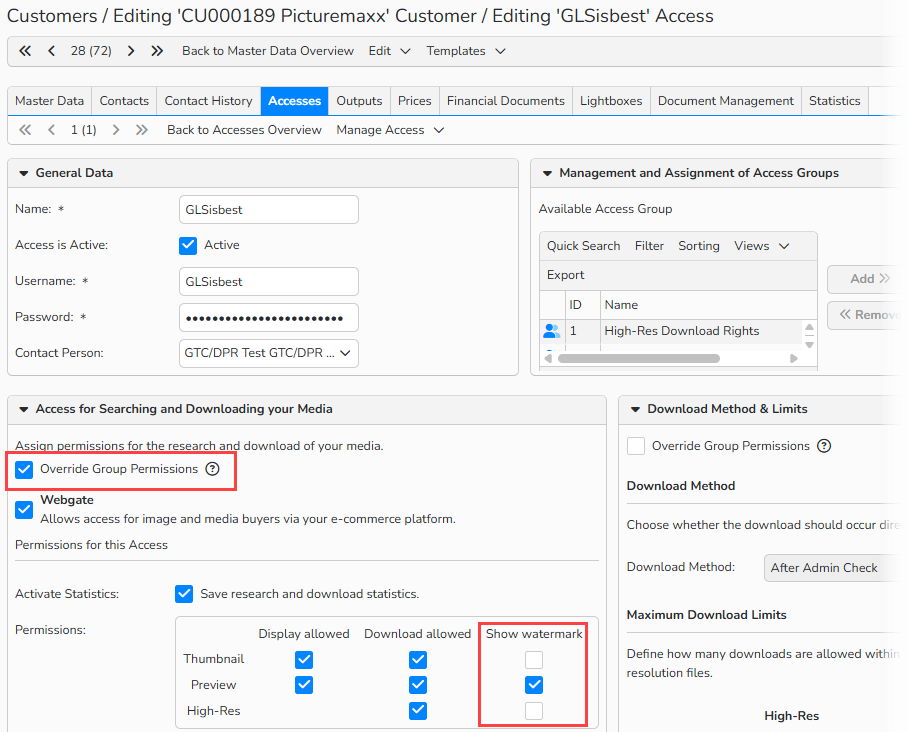
Customer master data window: override Access Group rights for watermark display
Manage watermark sets
In Administration > Media Attributes > Watermarks you can view all existing watermark sets.
To create a new watermark set
- Select Edit > New.
To edit an existing watermark set
- Double-click a record or select it and then Edit > Open.
- Make necessary changes and click Save
To copy an existing watermark set:
- Select a record and click Edit > Copy.
To delete a watermark set
- Select a record and click Edit > Delete.
Note
The integrated table functions allow you to search, filter, and sort records. For more information on these functions, as well as how to set up custom views and use the export function, see Advanced Table Views.