
Media Sizes
Download as PDFOverview
You can easily customize various media sizes used for marketing, billing, and distribution. This includes defining parameters such as dimensions, resolution, and quality.
By default, Backstage provides nine system defaults that cannot be deleted and allow only limited configuration. Beyond these, you have complete flexibility, there are no restrictions on the number or formats of your media sizes.
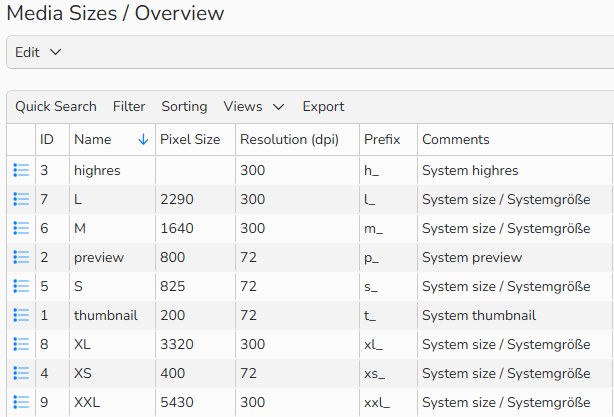
Overview of media sizes
Create media sizes
To create a new media size, proceed as follows:
- Navigate to Administration > Media Attributes > Midea Sizes.
- Click Edit > New. The New Media Size dialog opens.
- Enter the name of the media size.
- Choose between:
- Pixel Size (pixels on the long dimension)
- Alternatively, activate Use Original Size.
- Image Size (Uncompressed File Size in MB).
- Pixel Size (pixels on the long dimension)
- In Resolution (dpi), specify resolution in dpi.
- In the Quality field, define the compression quality for your media:
- 1 = lowest quality
- 100 = highest quality
- Alternatively, activate Use Original Quality.
- In the Prefix field, set a filename prefix to add it to downloads and distributions.
- Click Save.
- Switch to the Prices tab to review the price settings you defined for the media size in Finance > Prices > Download-Based Pricing.
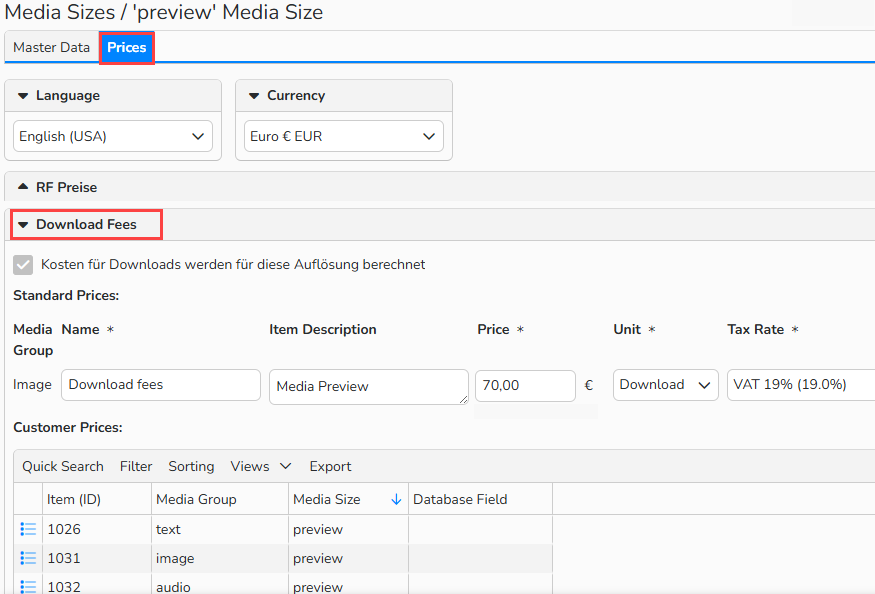
Media Sizes > Prices tab: Download Fees
Note
Refer to Download Based Prices to learn how to set up download fees.
Manage media sizes
You can manage media sizes in Administration > Media attributes > Media Sizes.
Create a new media size
- Select Edit > New from the menu.
Edit an existing media size
- Double-click the entry or select it and choose Edit > Open from the menu.
- Make the necessary changes and confirm by clicking Save.
Copy an existing media size
- Select the entry you want to copy and choose Edit > Copy from the menu.
Delete a media size
- Select the desired entry from the list and choose Edit > Delete.
- System media sizes cannot be deleted.
Note
The integrated table functions allow you to search, filter, and sort records. For more information on these functions, as well as how to set up custom views and use the export function, see Advanced Table Views.
Understanding Image Size vs File Size
Image size and File size are not the same thing. They measure different aspects of an image.
- Image size refers to raw uncompressed data based on pixels and colors.
- File size is the actual size of the image saved on a hard drive.
This explains why the original image size and the downloaded file size can differ in megabytes (MB). When you download an image, you are already receiving the full high-resolution version. The smaller file size simply results from compression, not reduced quality.
You can review these values in the Metadata tab of an image. For example:
- A high-resolution image has a file size of 2.69 MB (compressed JPG).
- The same image, when uncompressed, has an actual image size of 68.66 MB.
Despite the smaller file size, the downloaded image still contains the full resolution, the difference lies only in how the file is stored.
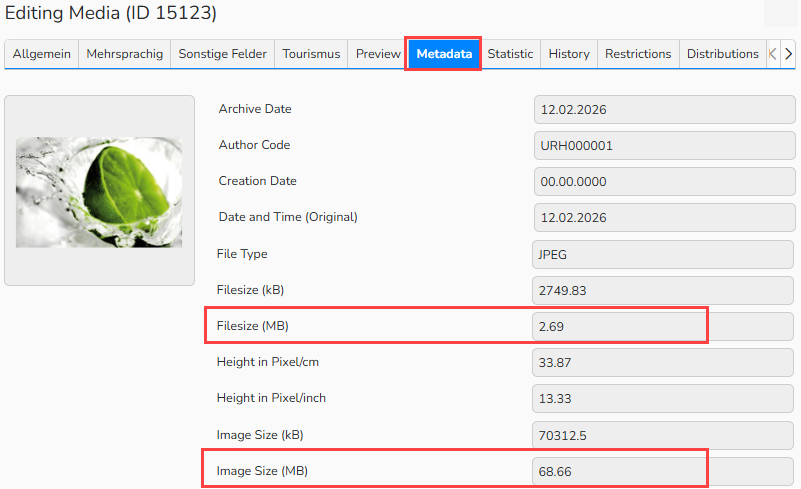
Metadata tab: File size vs Image size
Display options
If you prefer, we can adjust your webshop settings so that:
- Only the image dimensions (in pixels) are displayed, or
- All image size information is removed entirely.
Please contact us if you would like to make these changes.
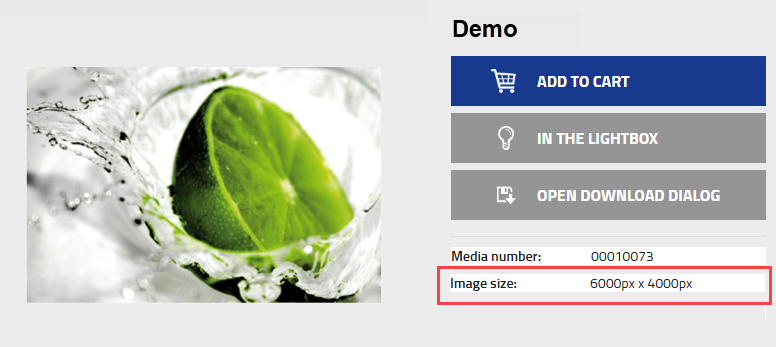
Webshop: “Image size” field displaying image dimensions in pixels