
Logo Lines
Download as PDFOverview
Create individual logo lines for your media files and assign them to archives or partner connections.
The picturemaxx Backstage Logo Line feature lets you add branding strips directly to your preview and high-res media. A Logo Line usually includes a logo and predefined text and/or metadata. Customers can then take in important information about your media with a quick glance.

Logo line added to a preview image
Add logo file
Before you start
Prepare all logo line files externally:
- Logo: The logo line should be of an appealing size and match the image dimensions. Find out the longest edge of your images under Administration > Media Attributes > Media Sizes.
- Height: Choose an appropriate height for your media. We recommended the following values:
- Preview: 40px
- High-res: 250px
- File name: without special characters to avoid display issues.
- File format: JPG, GIF, PNG, pay attention to transparency if necessary.
Upload the logo file
To upload the logo files to Backstage, proceed as follows:
- Go to Administration > Templates > Document Management
- In the Folders tree, select the folder where you want to upload the file.
- Click Upload Files to open the Upload dialog.
- In the dialog, click Add Files to select the file from your computer or simply drag and drop the files directly from your Explorer (Windows) or Finder (Mac) into the upload area.
- Click Upload All to start the upload.
- After the upload completes, click Back to Overview.
- After the file uploads successfully, it appears in the Document Management panel.
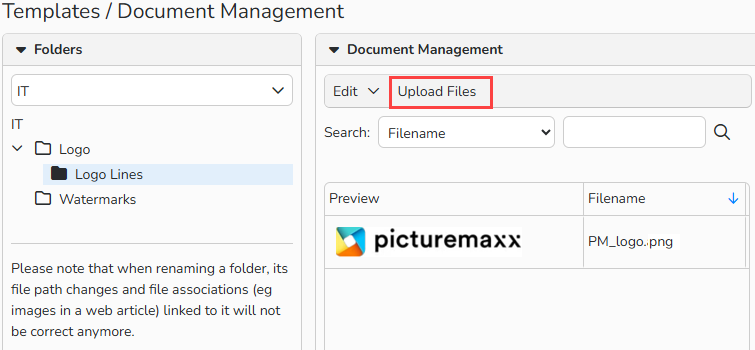
Administration > Templates > Document Management > Upload Files: Logo
Configure and activate logo line
- Go to Administration > Media Attributes > Logo Lines
- Select Edit > New.
- In the Master Data panel, enter a destinctive Name for your Logo Line.
- In the Activation of Logo Line panel, select the marketing channel(s) where the logo line shall be available:
- i-picturemaxx
- Webgate
- Partner Connections
- Select where you want to display the logo line:
- Archive and Partner Connections (based on database systems)
- Authors, Partners, Pools, and Syndications (based on master data)
- Channels
- A list of corresponding data sources is displayed. Select the data sources that you want to associate with this Logo Line and click Add.
- To undo the selection, click Remove.
- Optional: Replace the Logo Line of the selected data sources: This option allows you to cover the media of all selected archives and partner connections in landscape or portrait format with the logo line dimensions you specify.
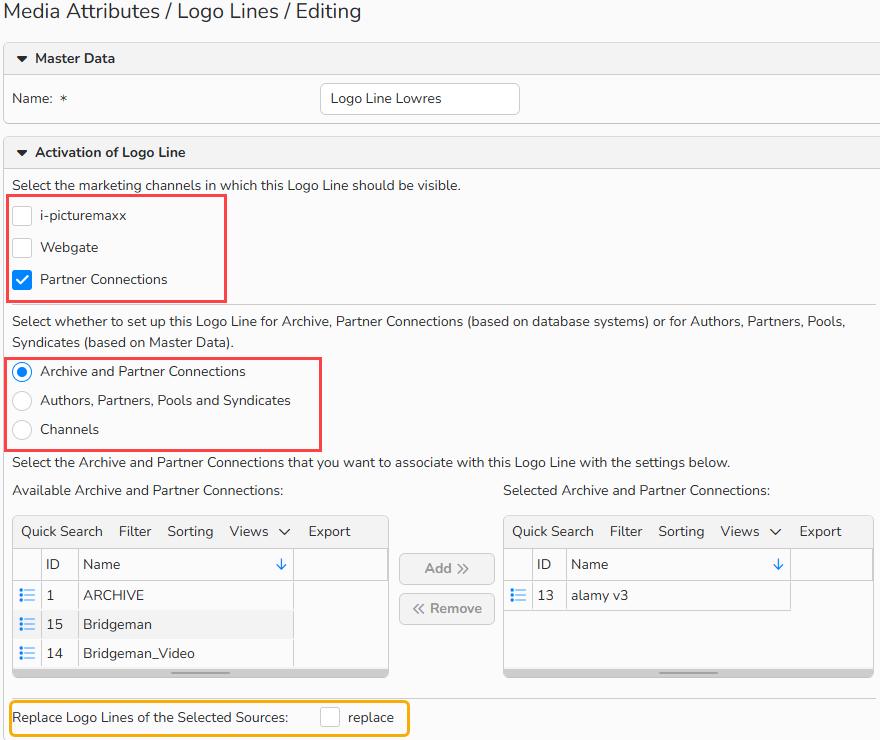
Media Attributes > Logo Line > Activation of Logo Line: associate logo line with data sources
Specify logo formatting and field mapping
In the Formatting and Field Mapping panel, configure the following settings:
- Font (.TTF): Set a logo line font in the TTF file format. The default font is Arial. To add more fonts, upload them via Administration > Templates > Document Management.
- Background color: Set a background color of the logo line.
- Font Color: Set a color of the logo line text.
- Logo line text: Type logo line text and add special metadata with the
 button.
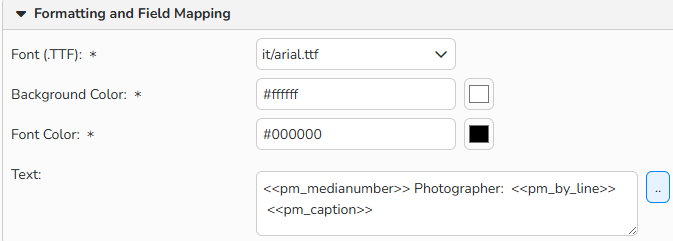
Media Attributes > Logo Line > Formatting and Field Mapping panel
Set logo, font size and line height for both preview and high-res
In the Logo, Font Size and Line Height panels for Preview and High-res, configure the following settings
- Font size of preview line (pixel):
- Recommended value for Preview: 12
- Recommended value for High-res: 40
- Size of preview line)/high-res line (pixels): set a height of the logo line. The width of the logo line is dynamically determined by the wider side of the image.
- Recommended value for Preview: 40
- Recommended value for High-res: 250
- Preview Logo/ High-res Logo (Horizontal): select a corresponding logo line file to upload it from Administration > Templates > Document Management.
- Click Save to make the new Logo Line available
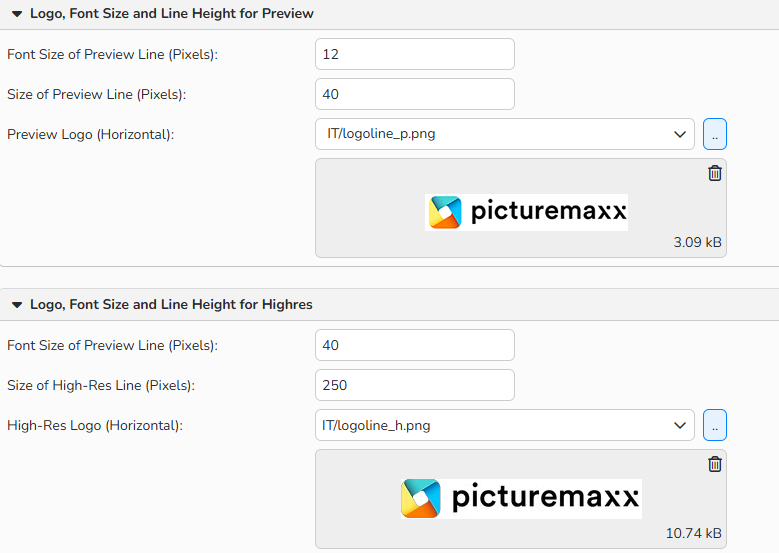
Media Attributes > Logo Line > Logo, Font Size and Line Height panels
Note
Refer to the FAQ Document Management to learn more about how to upload files.
Manage logo lines
In Administration > Media Attributes > Logo Lines you can access an overview of all Logo Lines.
To create a new logo line:
- Select Edit > New.
To edit an existing logo line:
- Double-click a row or select it and then Edit > Open.
- Make necessary changes.
- Click Save.
To copy an existing logo line:
- Select a row and click Edit > Copy.
To delete a logo line:
- Select a row and click Edit > Delete.
Note
The integrated table functions allow you to search, filter, and sort records. For more information on these functions, as well as how to set up custom views and use the export function, see Advanced Table Views.