
Contact Types
Download as PDFOverview
You can document all communications with customers, partners, and authors making business processes transparent for yourself and your employees. No agreement or arrangement will ever go lost. If you store these centrally, you can keep track of all interactions at any time.
Communication processes are referred to as contact types in Backstage. These can be letters, emails, or phone calls, to name just a few examples.
For your internal information and easy categorization, associate communication processes with a corresponding “Contact Type” – for example, an e-mail or a phone call. The system offers some default contact types. You can change them if needed.
The system can store contact types in additional languages available for the Backstage interface.
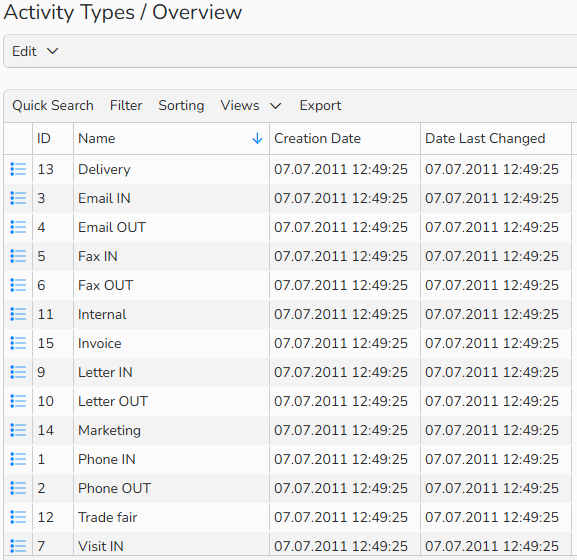
Overview of contact types
Create contact types
To create contact types, proceed as follows:
- Navigate to Administration > Settings > Contact Types.
- Select Edit > New.
- Enter an internal Name for the contact type, as well as a name in available languages.
- Click Save.

Contact type dialog: create an entry in different languages
Tip
Import Contact Types
There is a variety of default contact types predefined in Backstage. You can also integrate any custom contact types. To import them, contact us at support@picturemaxx.com. You will receive a migration template to fill out and return to us. This approach ensures a smooth and accurate integration.
Link contact types to contact history
The Contact History tab is available in all master data areas for documenting emails, phone calls, or internal messages, for example.
To get an optimal overview of your communication, you can log all transactions with your customers, authors, and employees here. Within this history, you have access to various contact types. Linking each communication entry to the responsible employee also enables an optimal workflow.
- Select a master data record in Sales > Customers; Purchasing > Authors, or Administration > Users,
- Within the record, switch to the Contact History tab. This is where you can document emails, phone calls, or internal notifications.
- Select a contact type from the Type drop-down to associate it with the contact history:

Customer master data > Contact History tab: Select a contact type
Manage contact types
All your existing contact types are listed under Administration > Settings > Contact Types.
To create a new Contact Type
- Select Edit > New.
To edit an existing Contact Type
- Double-click its name or select it and click Edit > Open.
- Change the Name as well as in the other languages.
- Click Save.
To delete an Contact Type
- Select the contact type you want to remove and click Edit > Delete.
Note
The integrated table functions allow you to search, filter, and sort records. For more information on these functions, as well as how to set up custom views and use the export function, see Advanced Table Views.