
Change Look and Feel
Overview
With the picturemaxx configuration you can define basic design elements and give your website an individual look. Here you can set the colors, add your logo and favicon, and define the fonts.
Define global color scheme
To configure your basic design elements:
- In Main Administrative Menu, navigate to Configuration > picturemaxx Configuration > Theme settings > Colors, logos & styles.
- On the Color configuration page, under Color scheme, select one of the following options from the Color set dropdown:
- Custom: Create your own color scheme.
- Default scheme: Use the standard picturemaxx Drupal CMS color scheme.
- If you select Custom, you can define colors for general design elements (for example, Main Background, Text, and Links). To set a color, either:
- Enter an HTML color code (for example,
#0055CC), or - Pick a color from the palette.
- Enter an HTML color code (for example,
- Use the Preview section to review your changes before saving them.
Quick Demo: Access theme settings to assign colors, specify display options, add logo and favicon.
Define background colors for paragraph types
Paragraph Types are the building blocks used to create and structure page content. To ensure a consistent look across your site, you can set up background colors that are available for all paragraph types.
To define background colors for paragraphs:
- Go to Configuration > picturemaxx Configuration > Theme settings > Colors, logos & styles.
- Scroll the Color configuration page down to Color settings.
- Enter custom colors into the Override palette of background colors field.
- Use the Hex triplet format (# followed by six symbols, e.g.,
#BBE6FA). - Enter color codes enclosed in square brackets, with values separated by commas and quotation marks.
Example: ["#BBE6FA","#E3FFEC","#FFDEC2"]
- Use the Hex triplet format (# followed by six symbols, e.g.,
- In the Dark background colors field, specify which colors should display white text for better contrast. Any color listed here will automatically display white text.
- Use the colors defined in Override palette of background colors.
- Enter values separated by commas. Do not use quotation marks or square brackets.
Example: #8c8c8c, #414141.
Once defined, these colors are available in the settings of each paragraph type under Display Options > Background‑Color Paragraph. Now you can easily apply them and keep your design consistent across all pages.
Assign accent colors to individual pages
You can assign a custom accent color to a page. The selected color is applied only to that page's content, while the rest of the website keeps the default theme accent color.
A custom accent color is applied to links, buttons, Call-to-Action elements, and other elements that use accent color styling. Global website elements, such as the header, main navigation, and footer, continue to use the color scheme of the active base theme.
To apply a custom accent color to a selected page:
- Open the page in edit mode.
- In the right-hand bar of the page editor, expand Page Settings to access the Accent Color pallet.
- Choose a color from the predefined color palette.
- Save the page.
Note
If no accent color is selected, the page continues to use the accent color defined by the base theme.
Define accent colors
To add accent colors to the predefined color palette:
- Go to Configuration > picturemaxx Configuration > Theme settings > Colors, logos & styles.
- Scroll the Color configuration page to Color settings.
- Enter custom colors into the Accent color options field.
- Use the Hex triplet format (# followed by six symbols, e.g.,
#BBE6FA). - Enter color codes enclosed in square brackets, with values separated by commas and quotation marks.
Example: ["#BBE6FA","#E3FFEC","#FFDEC2"]
- Use the Hex triplet format (# followed by six symbols, e.g.,
The defined colors become available under Page Settings > Accent Color in the right-hand bar of the page editor.
Add your logo
To upload a custom logo that will appear across your pages:
- Go to Configuration > picturemaxx Configuration > Theme settings > Colors, logos & styles.
- Scroll the Color configuration page down to Override global settings.
- Select the Logo image option.
- In the Path to custom logo field, delete the existing file path to remove the current logo.
- Upload your new logo file. Recommended settings:
- Use a PNG file cropped to the exact size you want it to appear.
Tip
For best results on high-resolution displays (e.g. 4K), upload a logo with a height of 300 px. This helps prevent it from appearing blurry or pixelated.
This recommendation does not apply to Header 1 and Header 2, where the logo is always displayed in its original size.
Add your favicon
A favicon is the small icon displayed in browser tabs and bookmarks.
To upload a custom icon to match your branding:
- Go to Configuration > picturemaxx Configuration > Theme settings > Colors, logos & styles.
- Scroll the Color configuration page down to Override global settings.
- Select the Favicon option.
- In the Path to custom icon field, delete the existing file path to remove the current icon.
- Upload your new favicon file. Recommended settings:
- Use a PNG file.
- The image should be square, with a maximum size of 48x48 px.
Configure main menu text casing
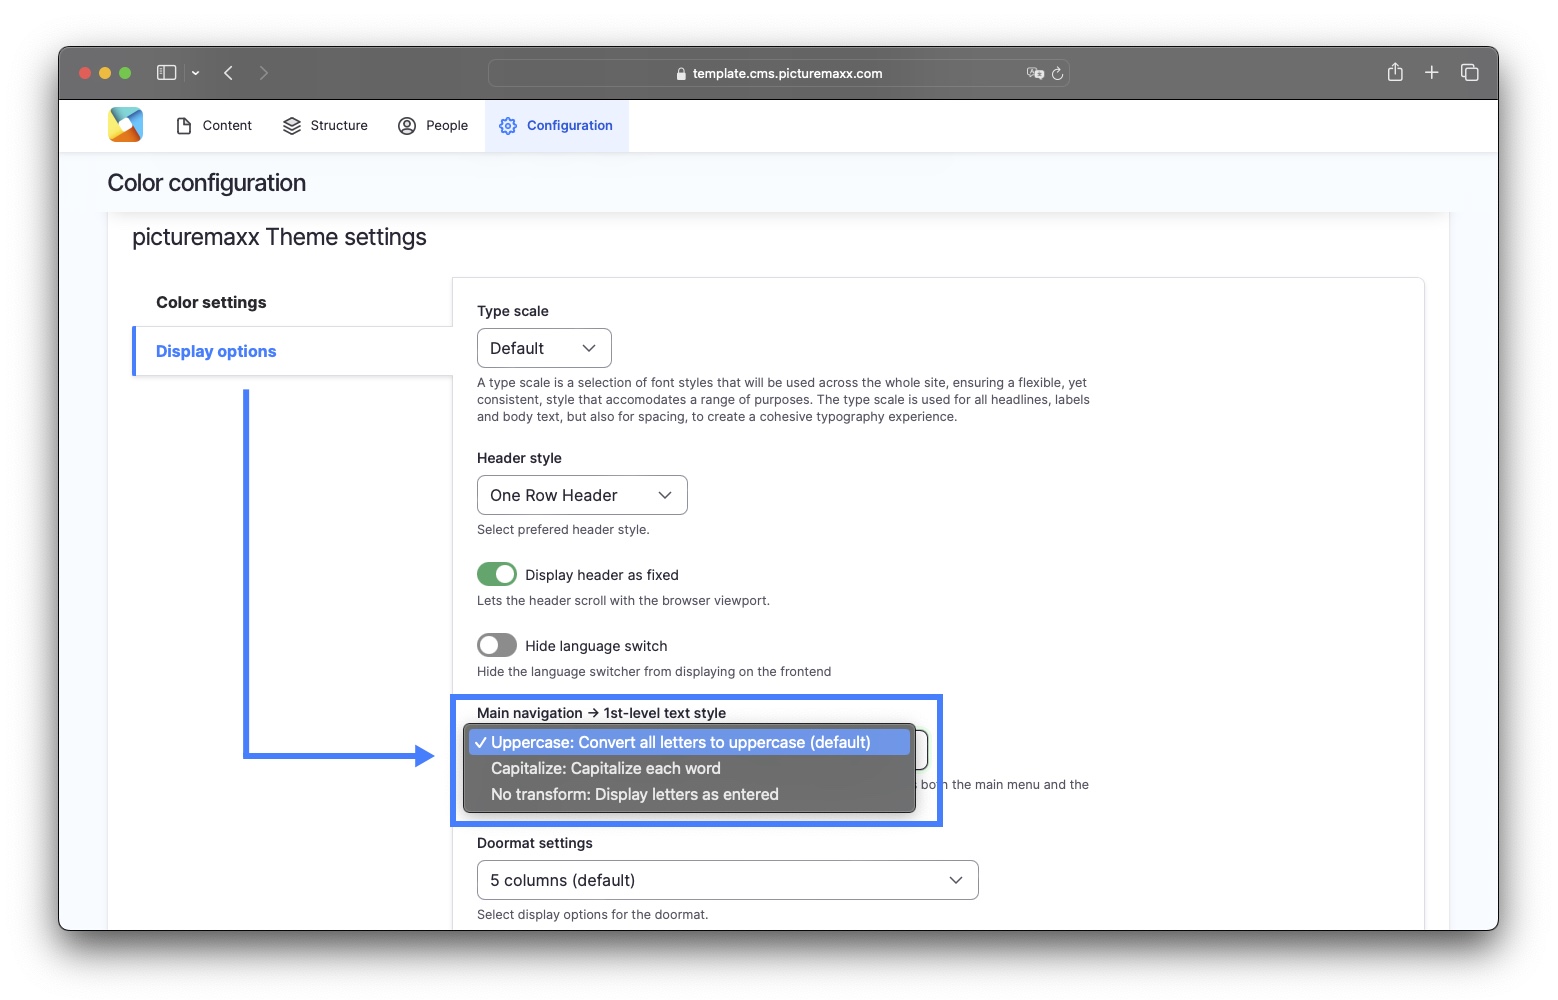
Set text casing for your main menu.
- Go to Configuration > picturemaxx Configuration > Theme settings > Colors, logos & styles.
- Scroll the Color configuration page down to picturemaxx Theme settings
- Open Display options and select one of the following:
- Uppercase: Convert all letters to uppercase (default)
- Capitalize: Capitalize each word
- No transform: Display letters as entered
Enable back-to-top button
Help your users get back to the top of a long page without scrolling:
- Go to Configuration > picturemaxx Configuration > Theme settings > Colors, logos & styles.
- Scroll the Color configuration page down to picturemaxx Theme settings
- Open Display options and enable the Use back-to-top option.
Manage fonts (upload custom or import Google Fonts)
The picturemaxx basic theme uses the Open Sans font family as a default font. You can change this to match your brand by uploading custom fonts or importing fonts from Google Fonts.
Important
Data protection notice
When using Google Fonts, the user's IP address is automatically transferred to Google. This may raise GDPR compliance concerns.
Recommendation: Download fonts and upload them locally to picturemaxx Drupal CMS instead of using the Google service. See Option 1: Upload custom fonts
Option 1: Upload custom fonts
Select desired font attributes and upload fonts to apply your own font style (WOFF format only).
To upload custom fonts:
- Go to Configuration > picturemaxx Configuration > Theme settings > Font selection and configuration.
- Select the Custom Fonts tab and click Add Custom Font.
- On the Add custom font page, upload your font files and define the font attributes.
After uploading a custom font, set up a Font Display as the final step. See Apply fonts to site elements below.
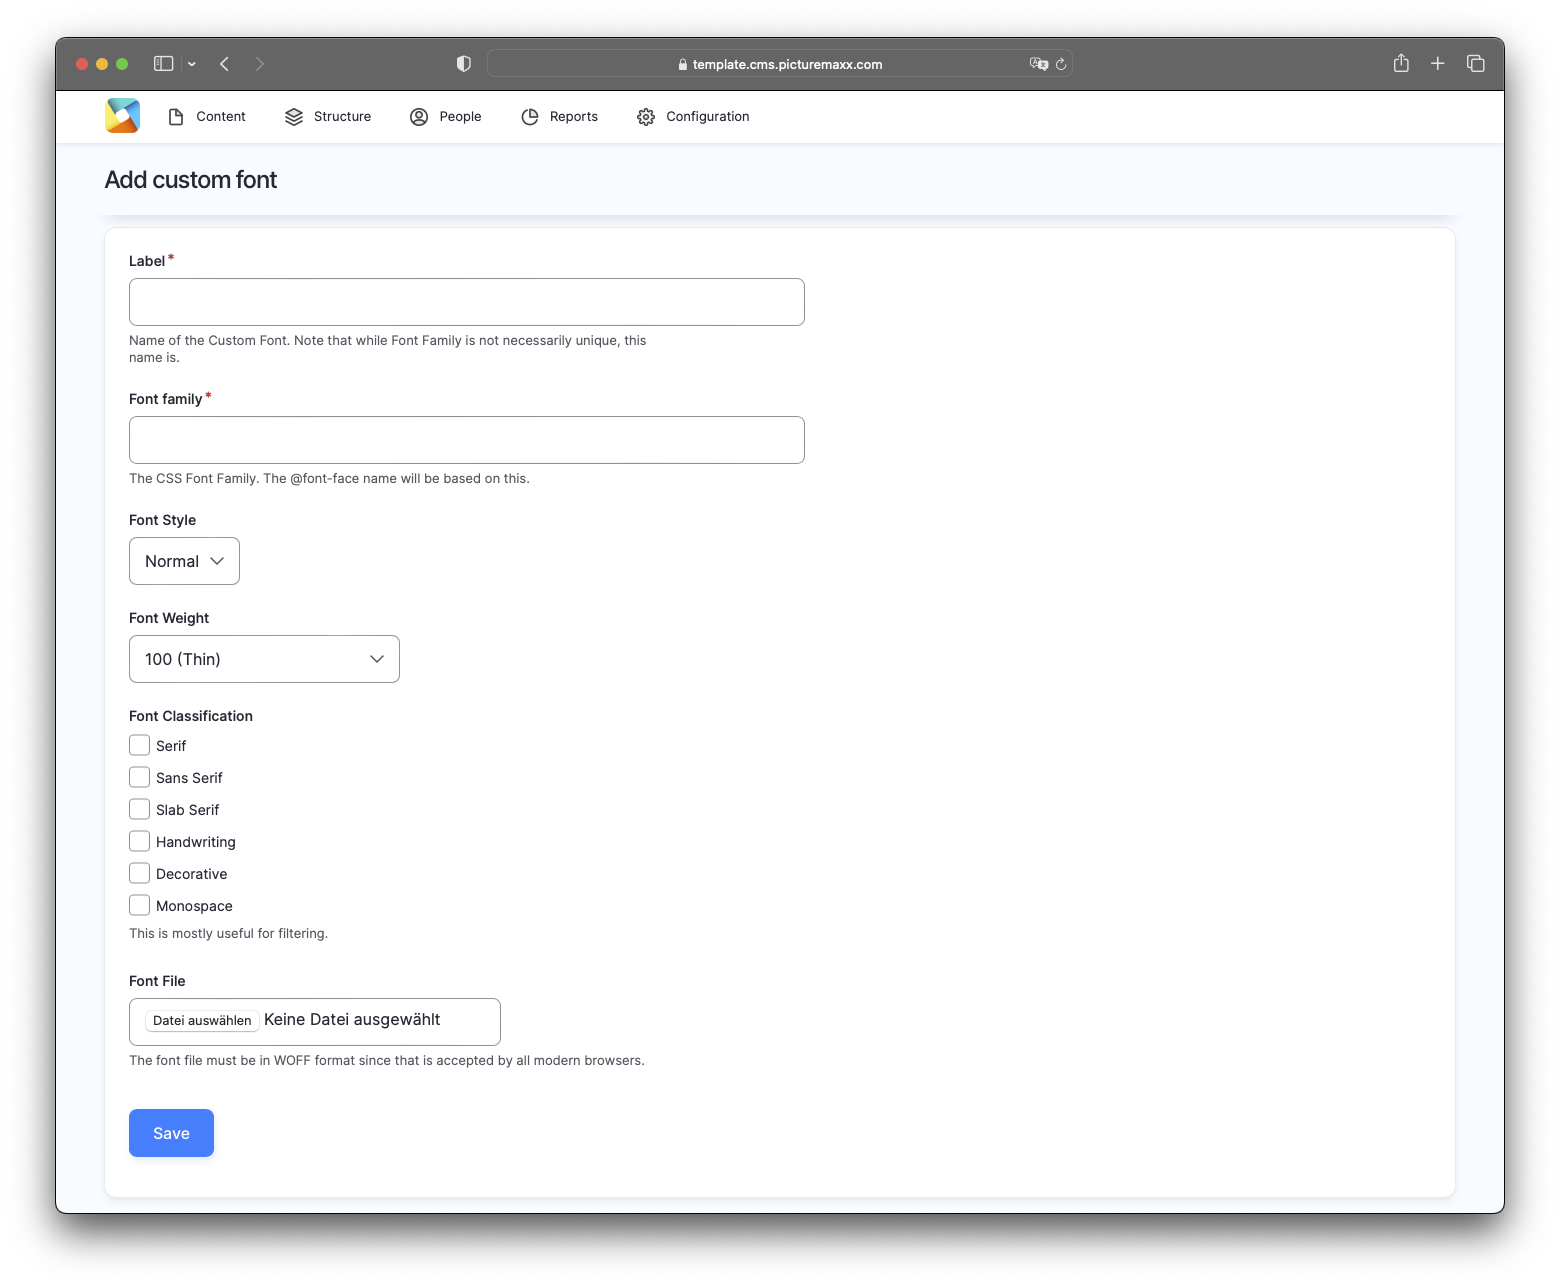 Field Reference
Label
Enter a unique name for this custom font. Note that this name is unique, while Font Family is not necessarily unique.
Font Family
Enter the CSS font-family name. This value is used in the generated @font-face rule.
Font Style
Select the font style for this font file. Choose between Normal and Italic.
Font Weight
The Font Weight property determines how light or bold the text appears and helps browsers use the correct font variant when rendering content.
Font Classification
Choose one or more categories that best describe the font. Classifications help organize and identify fonts, such as Serif, Sans Serif, Slab Serif, Handwriting, Decorative, Monospace.
Font File
Upload the font file for this font variant. Use a WOFF file, which is supported by all modern browsers and provides efficient web font delivery.
Option 2: Import Google fonts
Prerequisites: Google API Key
Follow this link https://developers.google.com/fonts/docs/developer_api#APIKey to get a Google API Key for fonts.
To import fonts from the Google Fonts service:
- Navigate to Configuration > picturemaxx Configuration > Theme settings > Font selection and configuration.
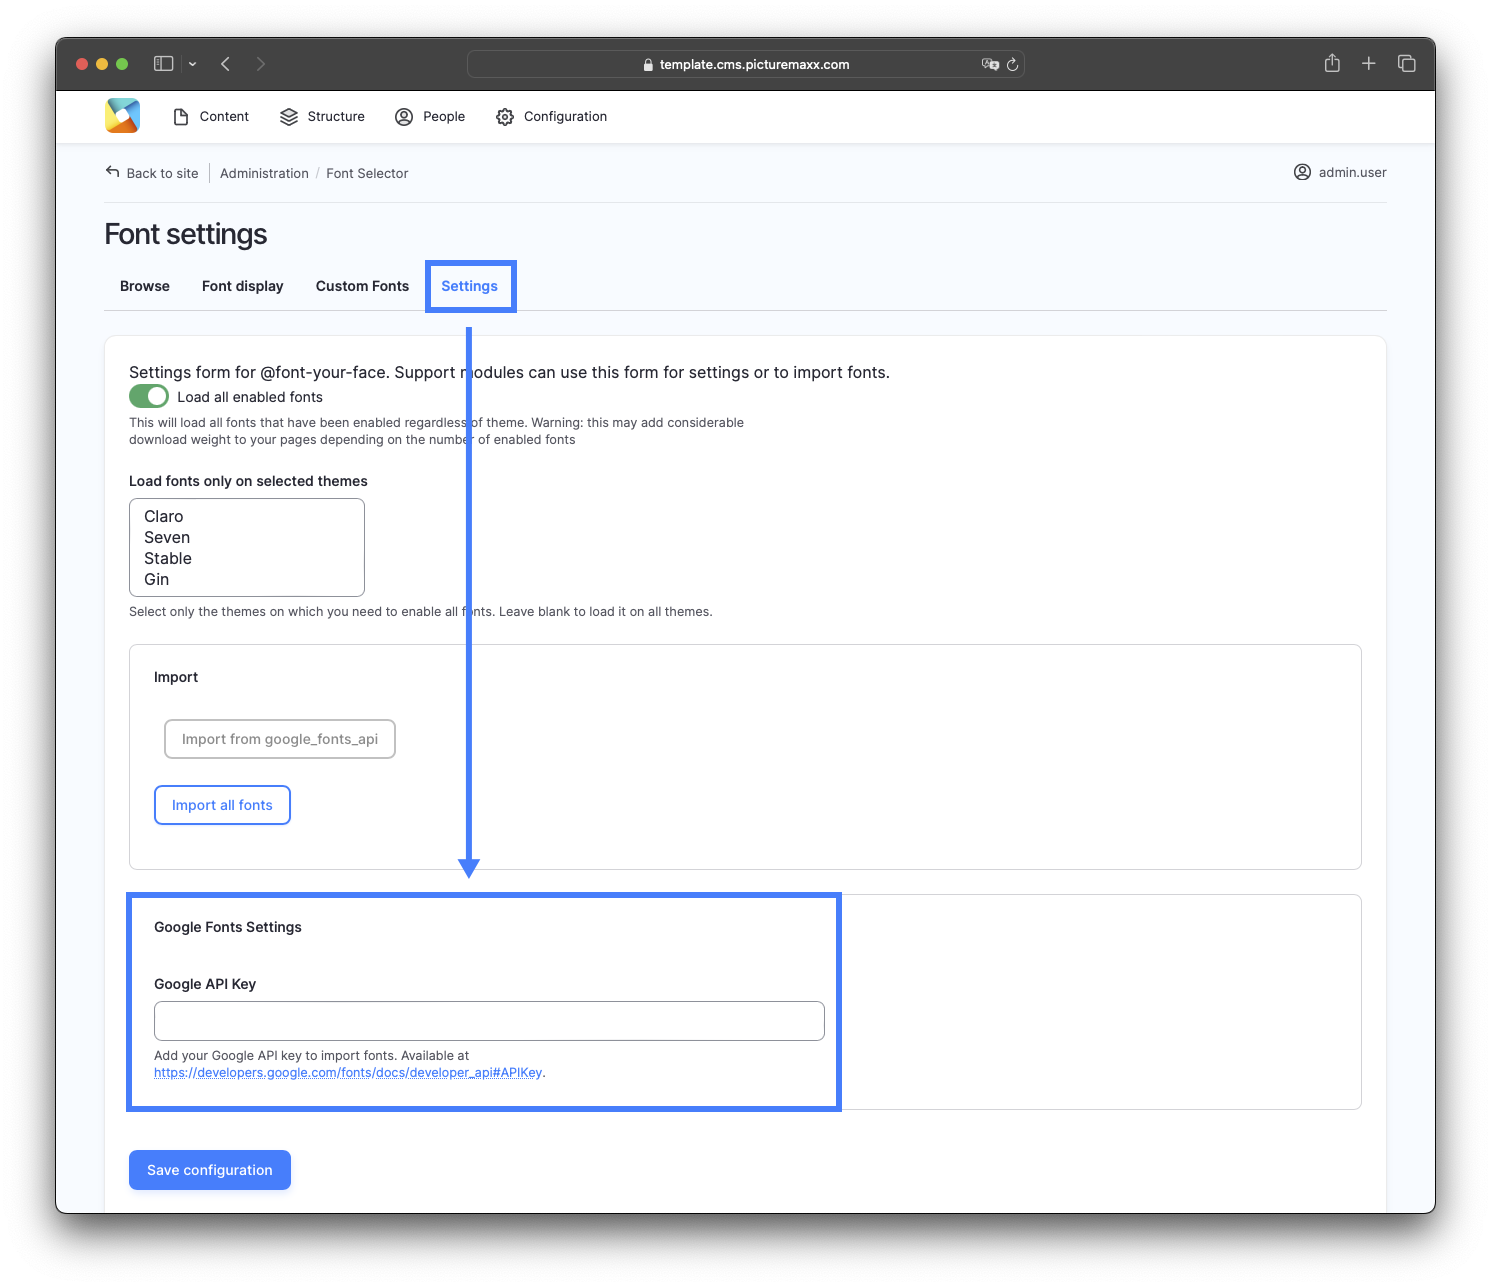
- On the Font Selector page, click the Settings tab next to Custom Fonts.
- On the Font settings page, enter your API key into the Google Fonts Settings box and click Save configuration.
- Scroll up and click the Import from google_fonts_api button to import available fonts.
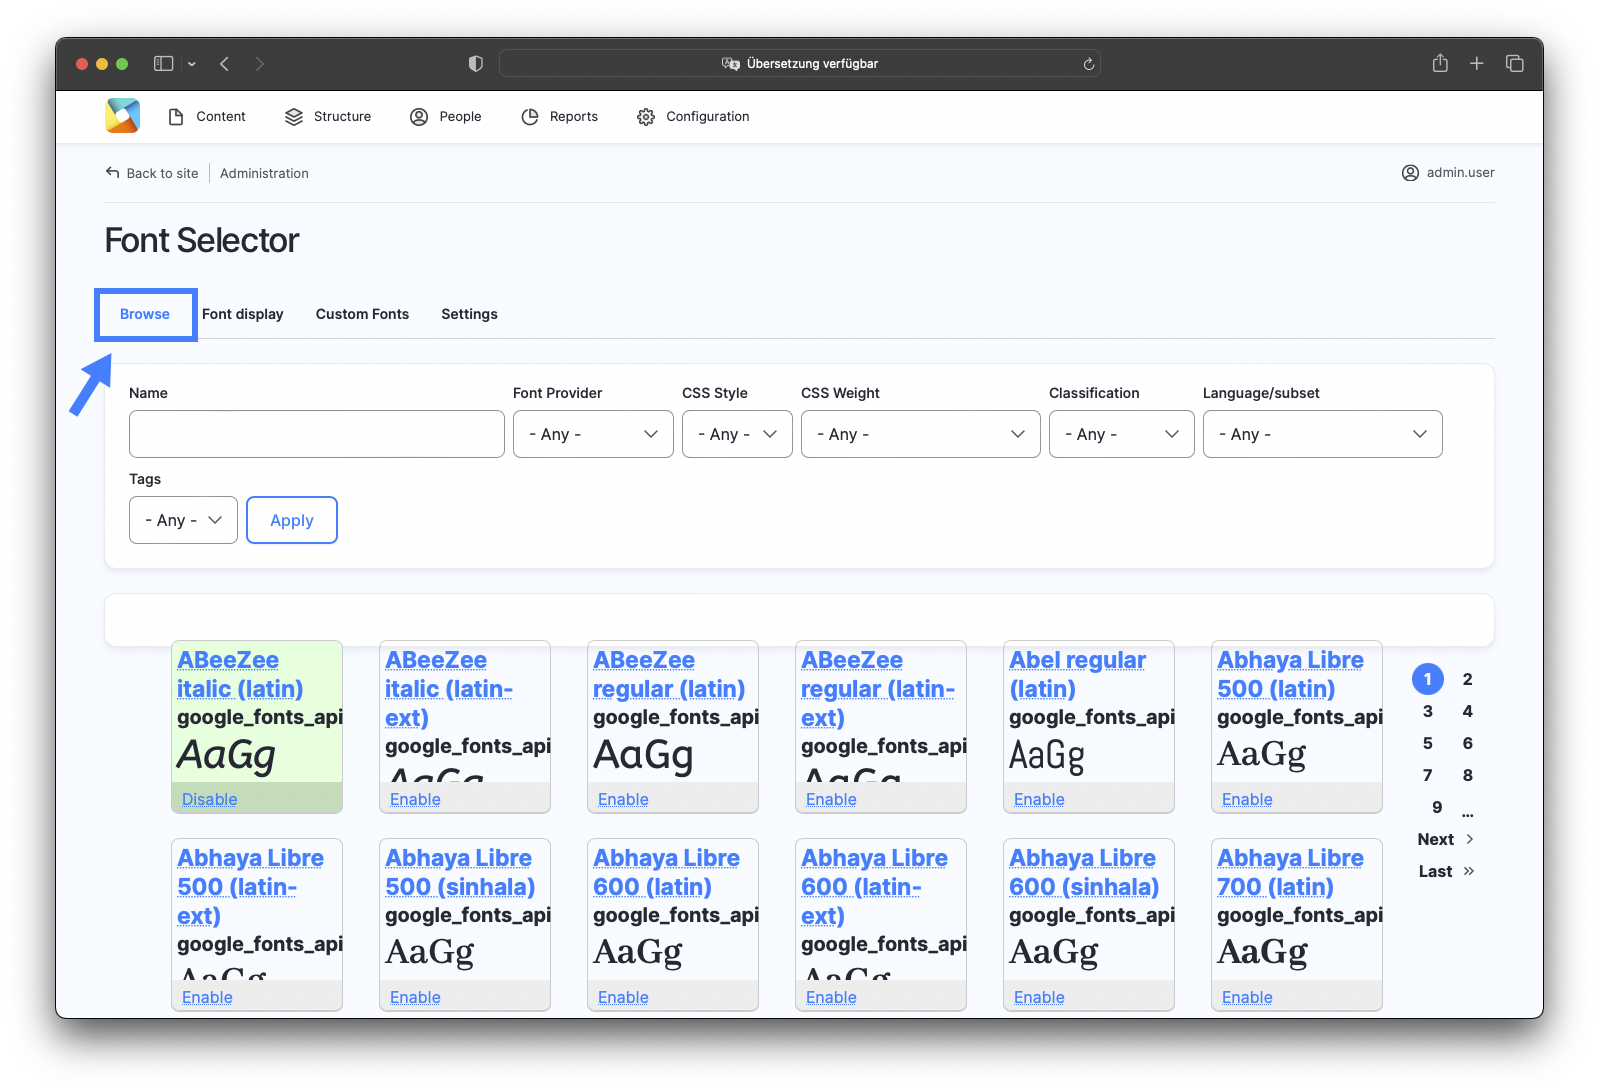
- Switch back to the Font Selector page and select the Browse tab.
- Explore available fonts and select the fonts you want to use.
After importing Google fonts, set up a Font Display as the final step. See Apply fonts to site elements below.
Apply fonts to site elements
After you have imported Custom fonts or Google fonts, you need to assign them to your site elements.
- Go to Configuration > picturemaxx Configuration > Theme settings > Font selection and configuration.
- Select the Font display tab and click Add Font display.
- Assign fonts to specific to specific selectors (e.g., headers, standard text) and the front-end theme.
This ensures selected fonts are applied consistently across your website.
Field Reference
Label
Enter a name for this font style. This label is for administrative use and helps you identify it later.
Font
Choose the custom or Google Font you want to apply to your website elements.
Fallback font
Select a backup font to be used if the chosen font cannot be loaded in the visitor's browser.
Preset selectors
Choose predefined site elements, such as headings, to quickly apply this font style.
Theme
Select the theme where font style should be available and applied.