Contact Form
Overview
Use a contact form to make it easy for website visitors to get in touch with you. Choose from the pre-designed templates to add a standard contact form or an event form.
Note
For custom contact forms tailored to your specific requirements, please contact us.
Add a contact form
- In the Main Administrative Menu, navigate to Content.
- In the Content Overview table, locate the page where you want to add the form and click Edit.
- Scroll to the bottom of the page editor. From the Add Section dropdown menu, select Add Form.
- (Optional) In the Headline field, enter a title or description text.
- From the Form drop-down menu, select one of the available templates:
- Contact Form
- Event Registration
- Feedback
- Configure the required fields and display options as described in Field Reference below.
- Save the changes.
Field Reference
Headline
Use the text editor tool to add introductory content, such as a title, description, or instructions for visitors.
Anchor Label
Enter a short label to create a link target for the sub-navigation. See Page anchors.
Form
Select a pre-designed template: Contact Form, Event Registration, or Feedback.
Form settings
Set the form status:
- Open: all visitors can access the form.
- Closed: only administrators access this webform and create new submissions.
- Scheduled: specify a date range during which visitors can view the form, for example. This option is useful for event registrations.
Display Options
Background-Image Paragraph
Add a background image to the form section.
Background-Colour Paragraph
Select a background color for the entire form section. To learn where to define new background colors for your Paragraph Types, see Define background colors for paragraph types in Change Look & Feel.
Use Parallax-Effect
Enable a parallax scrolling effect, where background and foreground content move at different speeds during scrolling. For more information, see Parallax Effect.
Published
Make the form visible to visitors. If disabled, only you can view the form.
Tip
To see an example of a published contact form, visit our Demo Page.
Configure the contact email address
Define the email address that receives messages submitted through the contact form.
- In the main navigation, go to Structure > Custom Tokens.
- In the Custom Tokens table, locate instance_contact-mail and click Edit.
- In the Content field, enter the email address that should receive website inquiries.
- Save your changes.
Tip
Learn more about Custom Tokens.
Customize the submission confirmation message
Configure the confirmation message displayed after a visitor successfully submits a form.
- In the main navigation, go to Structure > Custom Tokens.
- Locate contact_form_confirmation and click Edit to set up a submission success message.
- Enter the confirmation text into the Content field and save your changes.
View form submissions
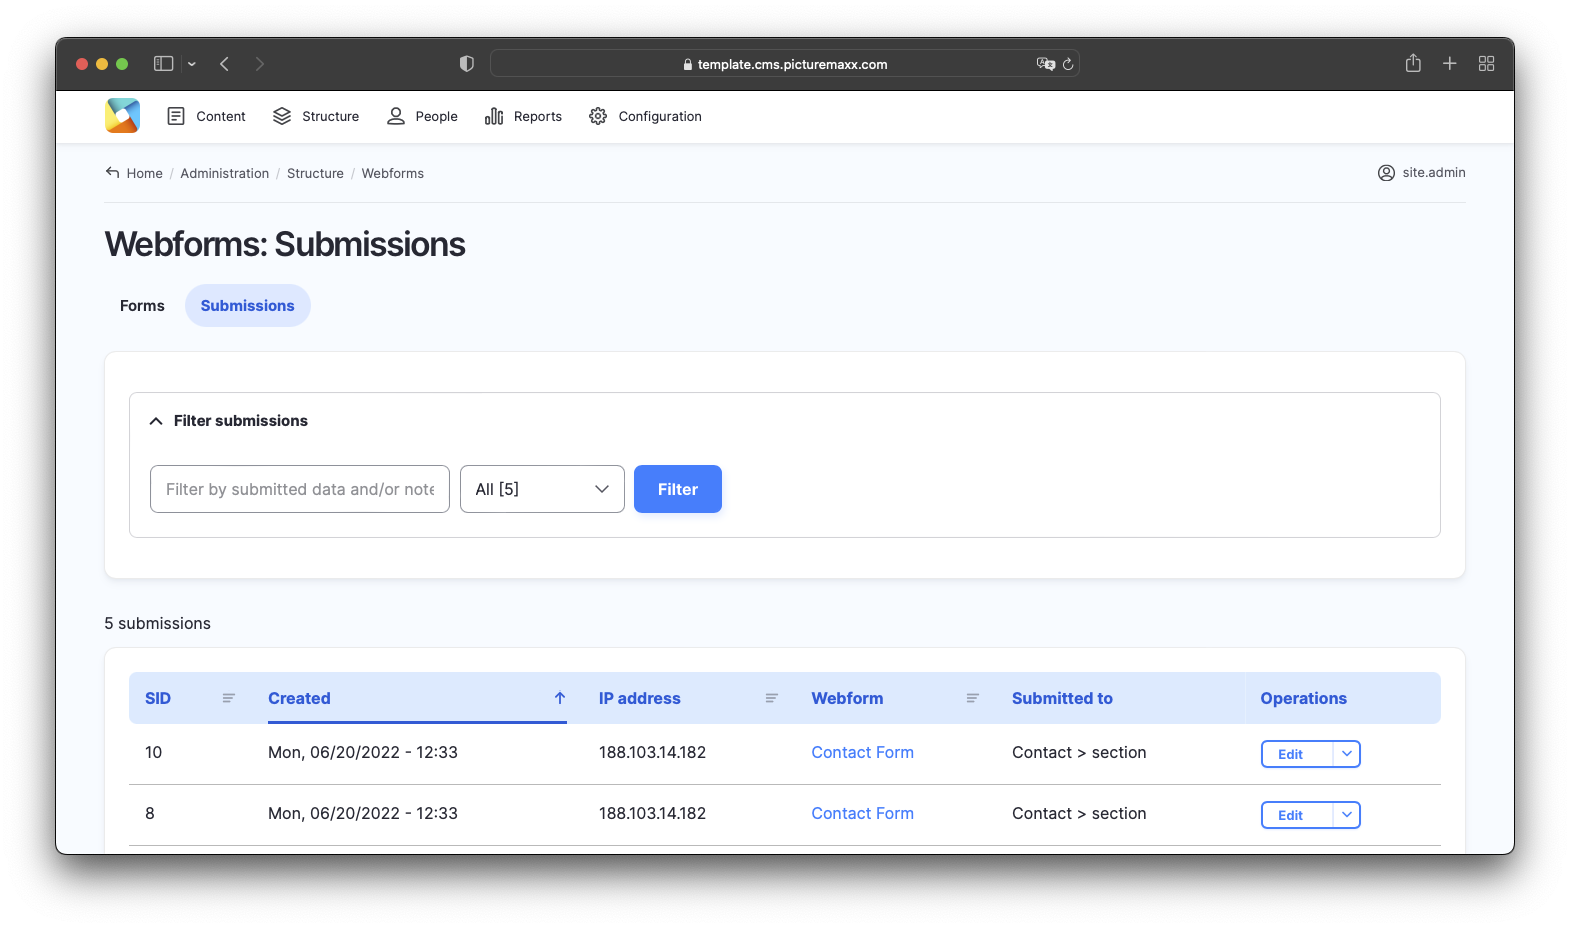
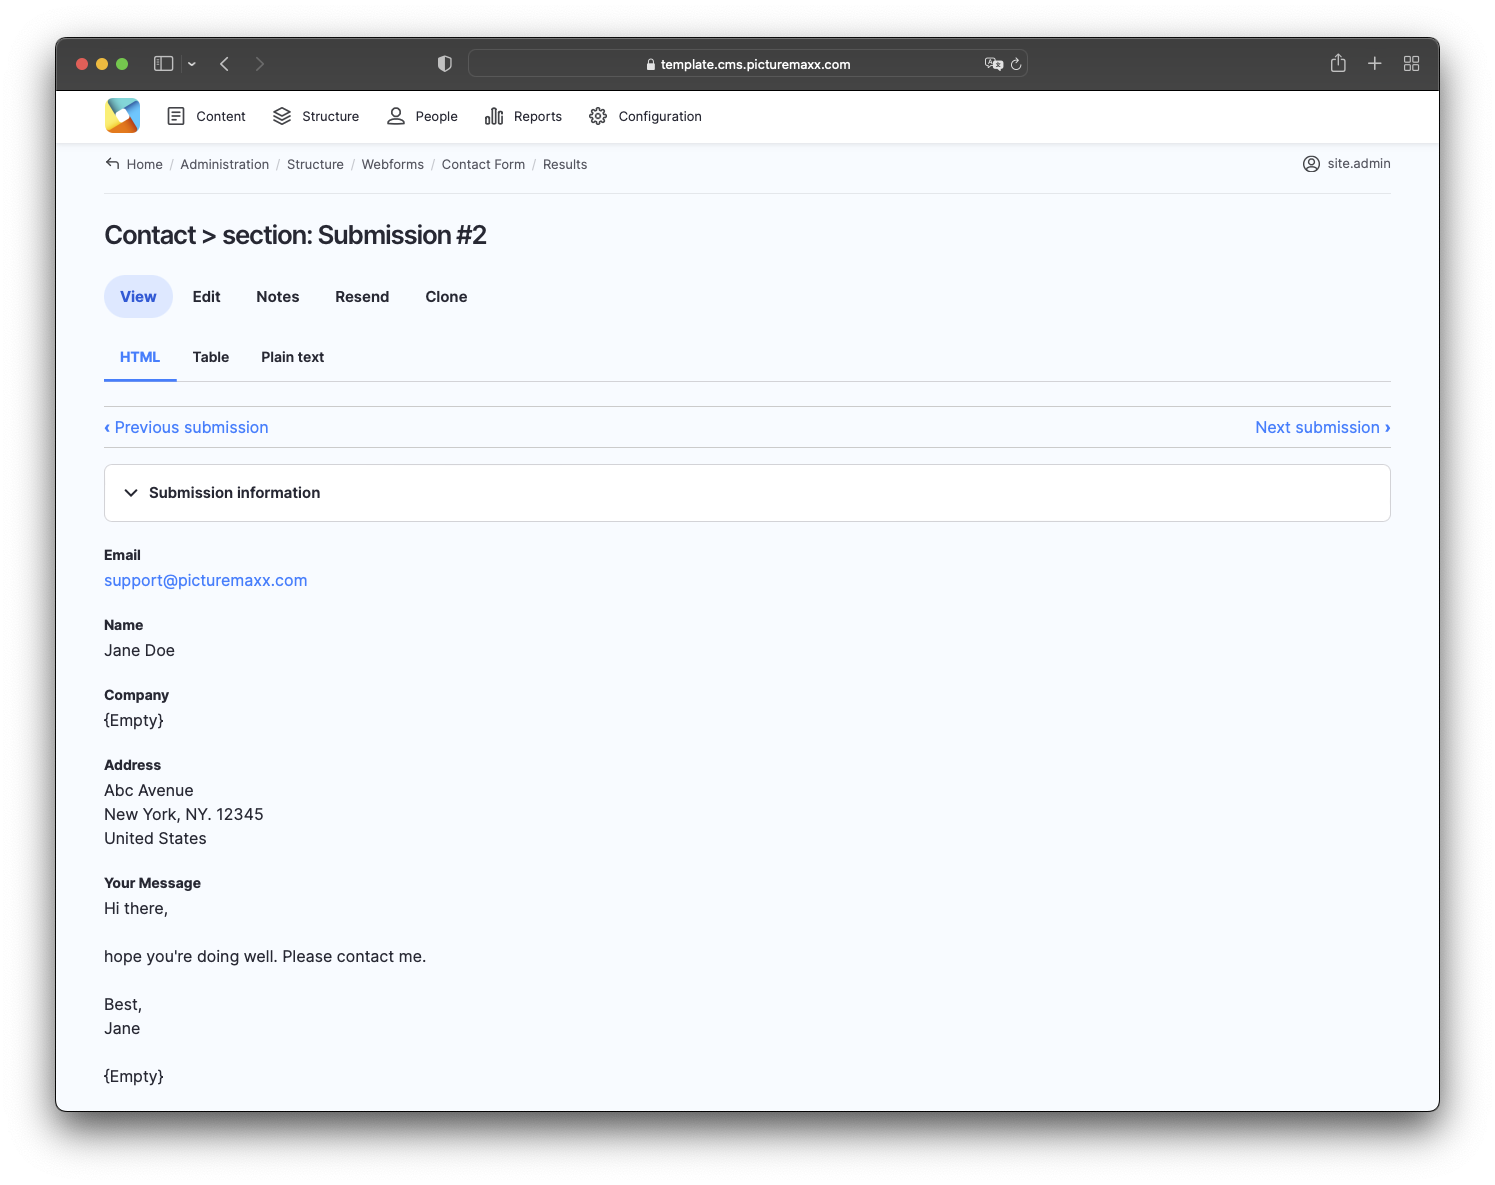
Get an overview of all messages submitted through your website forms.
- Navigate to Structure > Webforms > Submissions.
- Locate the form whose submissions you want to review.
- In the Operations column, open the Edit dropdown and select View to display the submitted message and its details.